ATA - Configure ATA 187
Goal
In this article, We will go through the steps necessary to configure a Cisco ATA 187 in CallTower Connect.
Resolution/Steps
Step #1
Make sure you have the required equipment.
- Cisco ATA 187
- 12V AC/DC power adaptor compatible with the ATA
- Analog handset with a dial pad
Step #2
Build the device in CallTower Connect by first going to the "Phones" section from the hamburger menu at the top left of the page.
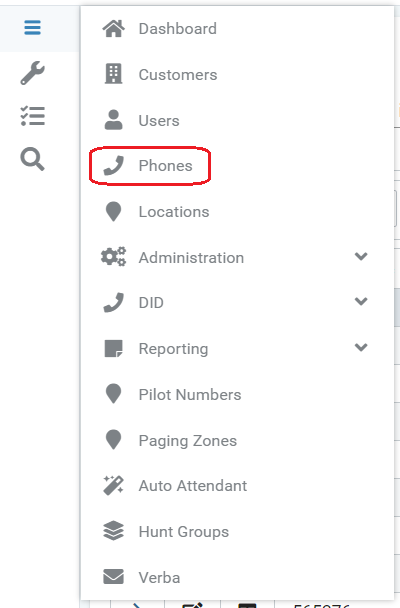
Once you are on the "Phones" page you then will need to add the device by selecting the add button: 
The "Add Phone" pop-up will appear and you will need to select the "Device Purpose" of the phone you are adding.
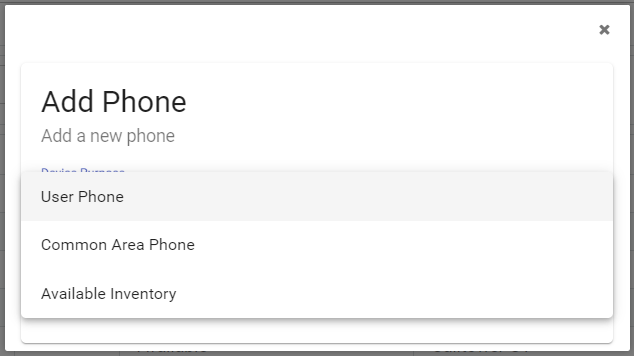
Device Purpose Definitions:
User Phone - A phone that is going to be assigned to a specific user with a Voicemail box.
Common Area Phone - A phone that is not going to be assigned a user or Voicemail. This is used to make and take calls like a hallway phone.
Available Inventory - Phone that will be added to CallTower Connect to be used for a later time.
You will now need to complete the following information:
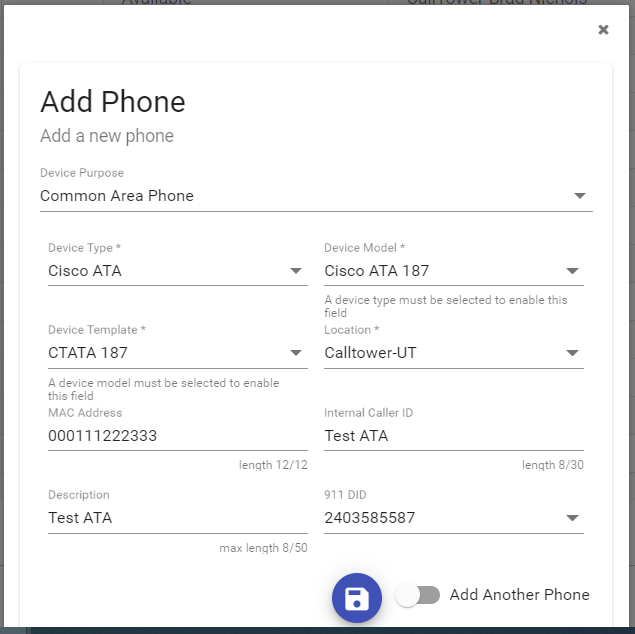
For a Common Area Device:
Device Type - Cisco ATA
Device Model - Cisco ATA 187
Device Template - CTATA 187
MAC Address - put in the 12 character MAC Address of the device.
Location - Select the location of the device.
911 DID - Select the DID from the drop-down that will be assigned to this device.
For a User Phone Device:
Device Type - Cisco ATA
Device Model - Cisco ATA 187
Device Template - CTATA 187
MAC Address - put in the 12 character MAC Address of the device.
Location - Select the location of the device.
911 DID - Select the DID from the drop-down that will be assigned to this device.
Select User - Select the User that will be assigned this device.
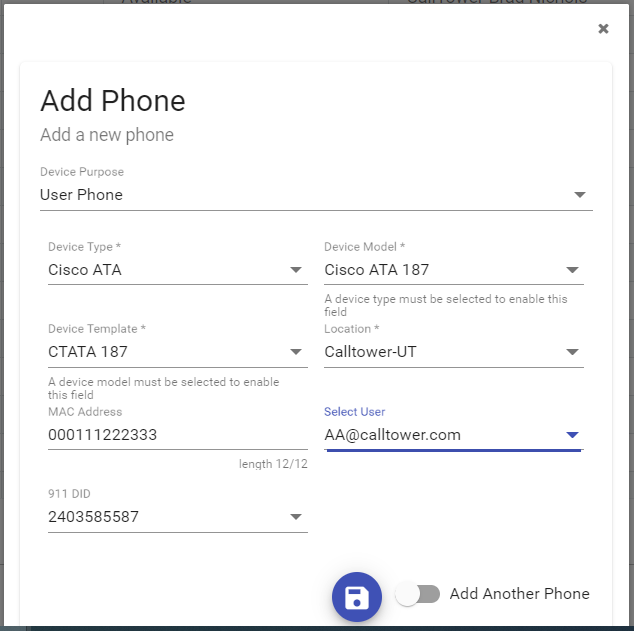
Once completed hit the save button: 
Step #3
Once the device is successfully added to CallTower Connect; plug in the ATA to a voice port via a network switch. Make sure the power is plugged in and connect the analog handset to the ATA into port "Line 1."
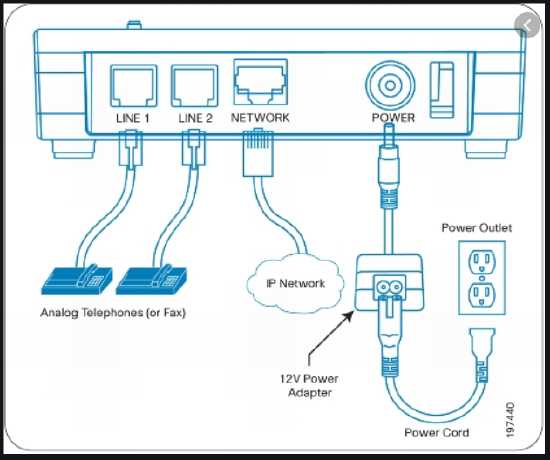
After the Device is all plugged in the lights will flash for a moment, then they should all turn off with the exception of the power light.
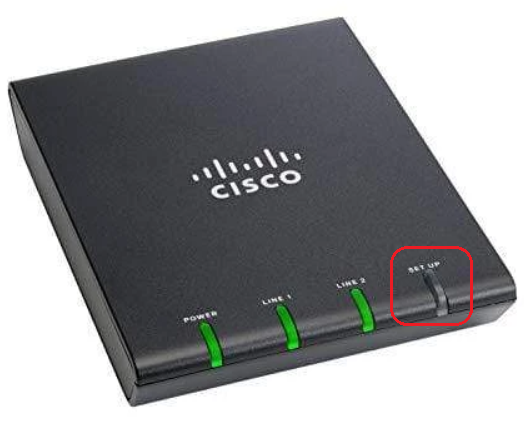
At this point, pick up the analog handset (line 1 should light up) and you should hear beeping. Press the setup button on the physical device and it should turn red and prompt you to enter the password followed by the pound key (cisco#).
You will now be in the configuration menu, (If it is a used device press 0 to reset to factory. Then it will reboot and you will have to get back into the configuration menu). Once you are back into the configuration menu press 2 to configure the TFTP setting. It will relay the current TFTP if you need to change it, start entering the new TFTP using the * symbol in replace of the . symbol and end with the pound key. (IE: 255*255*255*255#).
If you are unsure of the TFTP setting please contact CallTower Support at support@calltower.com or call 800-347-5444.
The ATA will switch over to the new TFTP. Wait a couple of minutes for it to do this. Then pick up the handset and you should hear a ring tone. Place a test call to confirm that it is working.
NOTE: if the TFTP gets relayed as 0.0.0.0 then make sure to check that the device is getting an IP in the network settings. Option 1 in the configuration menu.