Cisco - Configuring Phone For VPN
GOAL:
To be able to add a new VPN phone in the Connect Portal
Adding a VPN Phone in Connect
1. Log in to the Admin Portal.
2. Navigate to the phones tab "  " and select
  Add at the top of the screen.
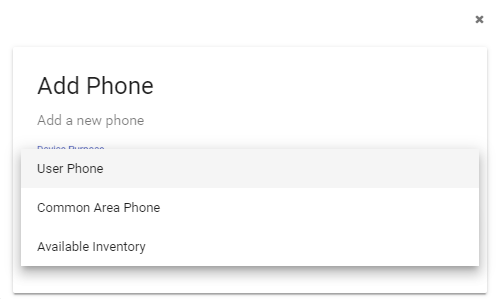
3. Select either User Phone or Common Area Phone under "Device Purpose" depending on the intended use of the phone.
4. Using the Device Type drop-down select Cisco Remote Phone - VPN Enabled

5. Fill out all required fields according to the specifics of the phone that you are setting up.

6. Select save 
Note:
If the phone has been built in Connect but is provisioned as Available Inventory (the phone will say 'Available' in the description) it will need to either be changed to a common area phone or added to a user. Also, make sure that the Device Name reads Cisco Remote Phone - VPN Enabled.
If it does not the phone will need to be deleted and re-added as a VPN enabled phone. To find the device name, find the phone in the phones tab, highlight it, and click Update near the top of the page.
Changing an Available Inventory Phone to a Common Area Phone
1. Log in to the Admin Portal and navigate to the phones tab
2. Locate the phone which you would like to change by either scrolling through the list of phones or using the search bar near the top of the page.
3. Click on the phone to select it.
4. Select the hamburger menu  under the highlighted phone and select "Change to Common area Phone"
5. You will then be prompted to add a "Description" and "Internal Caller ID". You will also need to select a "911 DID" from the available drop-down menu.
6. Select save
Adding an Available Inventory Phone to a User
1. Log in to the Admin Portal and navigate to the Users tab
2. Locate the user to whom you wish to assign the phone by scrolling through the list of users or making use of the search bar near the top of the page.
3. Click on the user so that they are highlighted.
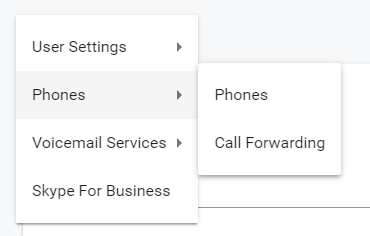
4. Select the hamburger menu under the highlighted user and select "Phones" and then "Phones"
5. This will now open the "User Phones" section. From here you will need to select the "Add" button
6. A new window will open. From here you will need to open the "Available Phones" drop-down and select the appropriate phone.
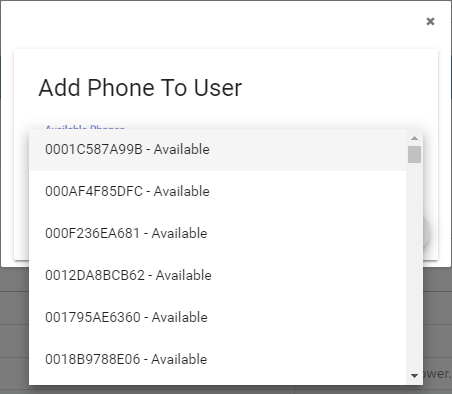
7. Click the appropriate MAC address and select a 911 DID from the provided drop-down menu. Note: the DID's are pulled from the location that the available phone is located.
8. Click the Save button 
The phone will now provision in CallManager and is ready to be set up
Setting up a 7942 or 7962 for VPN use
1. Remove the phone and cable from packaging
2. Connect the phone to the voice port using cable
3. When the screen reads 'registering' select the Settings button
4. A window will pop up, select option 4 Admin Settings
5. Select Ethernet Setup (option 1)
6. Select IPV4 Setup (option 1)
7. Find the Alternate TFTP option (option 8), highlight it and select On
8. Scroll down to TFTP Server 1 (option 9) and edit this to match your Call Manager cluster (The Support team can assist you with this if you are unsure of the address.)
NOTE: When configuring a VPN phone at one of their office locations the TFTP server should automatically populate with the correct Cluster IP.
9. Clear the CTL/ITL files
a. Find and select the settings button on the phone
b. Go to Security Configuration -> Trust List
c. Hit **# to unlock the setting
d. Highlight ITL File
e. Hit Select and then the Erase softkey
NOTE: It may be necessary to hit **# after steps d and e to fully unlock the settings
10. The phone will now register, this may take a few minutes.
11. Once the phone has registered on the voice port unplug it and plug it into the data port.
12. The screen will once again say registering. place test calls after it has registered
a. place a call to an off-net number (cell phone or Lync phone are good for this) and confirm two-way audio
b. use an off-net phone to call the new VPN phone. Once again confirm two-way audio.
13. Test the functionality of the buttons on the phone.
14. Clear the CTL/ITL file again and unplug the phone before it can register with a new one
Setting up an 88xx for VPN use
1. Remove the phone and cable from packaging
2. Connect the phone to the voice port using cable
3. When the screen reads 'registering' select the Settings button
4. A window will pop up, select option 4 Admin Settings
5. Select Ethernet Setup (option 1)
6. Select IPV4 Setup (option 1)
7. Find the Alternate TFTP option (option 8), highlight it and select On
8. Scroll down to TFTP Server 1 (option 9) and edit this to match the cluster of the OU (The Support team can assist you with this if you are unsure of the address.)
NOTE: When configuring a VPN phone at one of their office locations the TFTP server should automatically populate with the correct Cluster IP.
9. The phone will prompt you to erase the trust list, select erase.
10. The phone will now register, this may take a few minutes.
11. Once the phone has registered on the voice port unplug it and plug it into the data port.
12. The screen will once again say registering. Once the phone has registered, place test calls
a. place a call to an off-net number (cell phone or Lync phone are good for this) and confirm two-way audio
b. use an off-net phone to call the new VPN phone. Once again confirm two-way audio.
13. Test the functionality of the buttons on the phone.
The phone is now ready to be shipped and should be returned to Logistics