MS Teams Operator Connect - Number Management
Note:
- If you are in implementation, contact your Implementation Manager and they will take care of this for you.
- Outside of implementation, follow the steps below.
Locations in Teams Admin and CallTower Connect
Numbers are housed within locations in CallTower Connect. For instructions on how to add a new location see the article MS TEAMS OPERATOR CONNECT - ADDING A LOCATION
Syncing DID's
Remember to always release a number from Connect and not the Teams Admin Center. If you need to sync the numbers again see the article Syncing Teams Operator Connect DID Actions
Manage Numbers in CallTower Connect
- From the menu on the left, select "Locations" and then select the location.
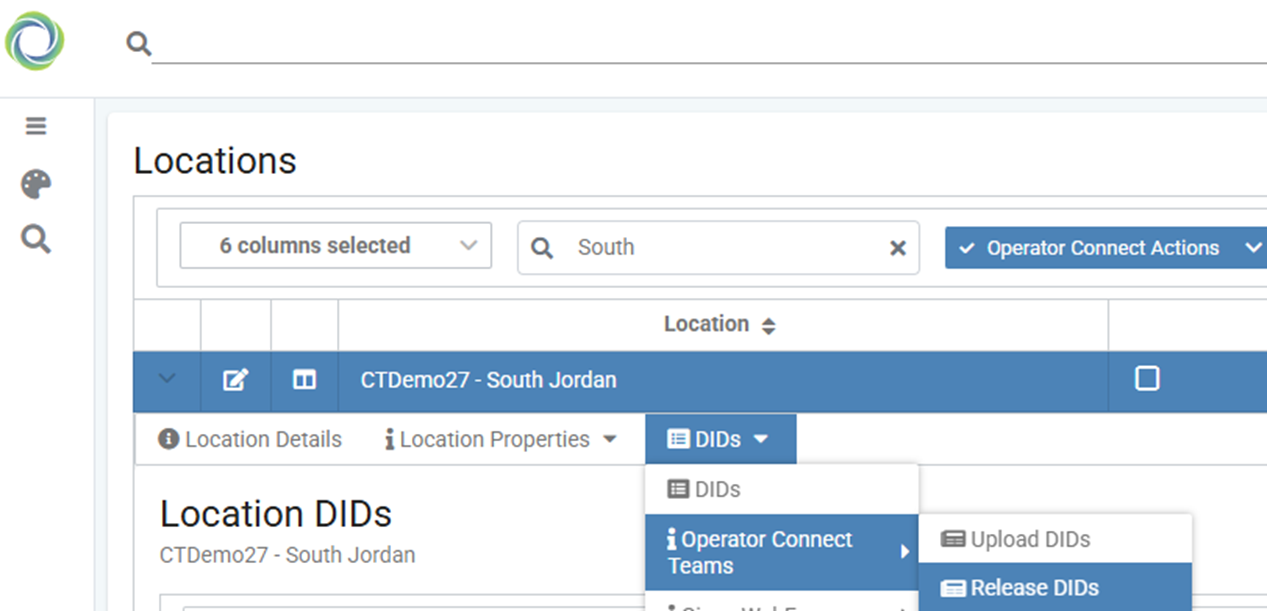
- Select "Operator Connect" and then "Release DID's" or "Move DID's" or "Upload DID's"
Upload DID's
Uploads the number/DID to Teams Admin Center with the information corresponding to the Location/Emergency Address it is listed under in Connect.
This will require MPOC privileges in Connect.
Navigate to connect.calltower.com and select locations from the Menu on the left-hand side of the screen.

Find the location the DID you wish to upload is in and select it. If you are unsure what location the DID is in it can be searched using the Global Filer box at the very top left of the screen.

Location DID's will show as below.

Select the Operator Connect Teams drop down and select Upload DID's.


Select the DID(s) you wish to upload and select the type these DID's will be.
You can upload up to 100 DID's at a time but they will all need to be one of the types below. If you are uploading voice app and users, you will need to do two different groups.
Users: Choose this option if the DID is to be assigned to a User or Common Area Phone / "Teams Shared Device" account.
Voice App: Choose this option if the DID is to be assigned to a Resource Account in your Teams Admin Center
Select the location subset (most companies will only have default, and this should be selected)
Default: Most companies will see this as their only option unless they have dynamic E911 set up for a location.
Other options: These are sublocations of the main location, which itself should already be set up as an Emergency Address location in Teams Admin Center

Click Save
DID Sub Type
There are 4 sub types
User – Number is assigned to a user and is billing a calling plan
Voice App – Number is assigned to a resource account for an Auto Attendant or Call Queue and is billing a calling plan
Upload Only User – Number is uploaded to the Teams Admin Center and not assigned to a user and is not billing a calling plan
Upload Only App – Number is uploaded to the Teams Admin Center and not assigned to a resource account and is not billing a calling plan

Release DID's
Releases the DID from Teams Admin Center back to Connect, making the DID Available to be re-uploaded to the same location as a different service type or be moved to another location through the DID list.
Navigate to the location you want to release the DID from. Please Note: before you release a number, the number must be unassigned in the Teams Admin Center

Select the number to release, you can select up to 100 numbers at a time. Then click “Release DID’s” at the bottom right

Move DID's
Moves the number from one location to another. allowing the number to be uploaded to Teams Admin Center via another “location/emergency address."


Select the numbers you would like to move; you can select up to 100 numbers at a time. Select the location from the drop down and click “Move DID’s” at the bottom right.

