Microsoft Teams - Building a New Teams User
Microsoft Teams – Building a New User
In order for CallTower Connect to add/remove phone numbers from user accounts, The CallTower Teams Voice App must be in place. See link here
Please Note: GCC High Teams Direct Routing Customers, numbers can only be added/removed from user accounts via PowerShell. If the Teams Voice App is not in place for CallTower Connect to use, then the user must be manually created/removed from CallTower Connect and then PowerShell must be used to add/remove the number from the user account.
Link to PowerShell Commands
https://www.uc.solutions/Microsoft_T..._For_CallTower
The user account must be created in Office 365 and have a Microsoft Teams Phone Standard license assigned. For information on how to perform this step, please refer to the Microsoft articles below:
Manage User Creation and Licensing in Entra ID
Creating the User
1. Sign in to the Microsoft Entra Admin Center:
a. Go to the Microsoft Entra Admin Center.
b. Sign in with your admin credentials.
2. Navigate to Users:
a. In the left-hand menu, select Identity > Users > All users.
3. Add a New User:
a. Click on + New user.
b. Fill in the required details such as Name, Username, and Password.
c. Optionally, you can set properties like Job title, Department, and Manager.
4. Assign Roles (Optional):
a. Under Roles, you can assign administrative roles if needed.
5. Create the User:
a. Click Create to add the user to your directory.
Licensing a User
6. Go to Licenses:
a. In the Microsoft Entra Admin Center, navigate to Identity > Billing > Licenses.
7. Select a License Plan:
a. Choose the license plan you want to assign to the user.
8. Assign the License:
a. Click on “Assign”
b. Select the user or users to whom you want to assign the license.
c. Confirm the assignment.
Additional information can be found in the official Microsoft documentation on creating users and assigning licenses.
Manage User Creation and Licensing in the O365 Admin Center:
Creating a User
1. Sign in to the Microsoft 365 Admin Center:
a. Go to the Microsoft 365 Admin Center.
b. Sign in with your admin credentials.
2. Navigate to Users:
a. In the left-hand menu, select Users > Active users.
3. Add a New User:
a. Click on Add a user.
b. Fill in the required details such as First name, Last name, Display name, Username, and Password.
c. You can choose to auto-generate a password or create your own. Optionally, you can require the user to change their password upon first sign-in.
4. Assign Roles (Optional):
a. Under Roles, you can assign administrative roles if needed.
5. Finish Adding the User:
a. Click “Finish adding” to create the user account.
Licensing a User
1. Go to Licenses:
a. In the Microsoft 365 Admin Center, navigate to Billing > Licenses.
2. Select a License Plan:
a. Choose the license plan you want to assign to the user.
3. Assign the License:
a. Click on Assign licenses.
b. Select the user(s) you want to assign the license to.
c. Confirm the assignment by clicking Save Changes.
For more detailed instructions, you can refer to the official Microsoft documentation on adding users and assigning licenses.
Resource accounts for Auto Attendants and Call Queues use the Microsoft Teams Phone Resource Account license, this license cannot be used on users.
Manually Create User
To create a user manually
Log into CallTower Connect using your username and password (if you do not know your username and password, contact support at support@calltower.com): connect.calltower.com
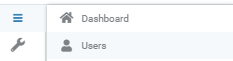
Once logged in, click on the ellipses at the top left and navigate to the user icon
Click the blue plus on the right-hand side

Fill out the user information example shown in the screenshot below. Be sure that the username matches the same username in 365.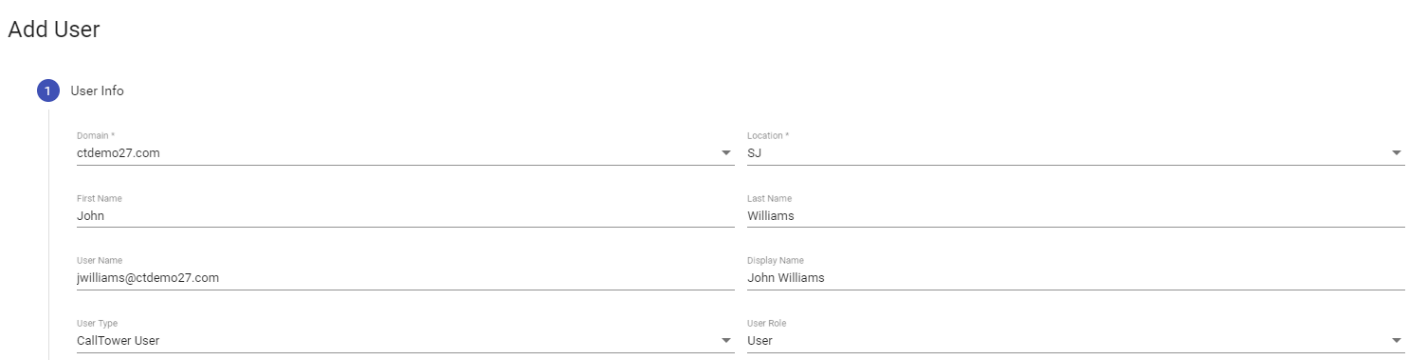
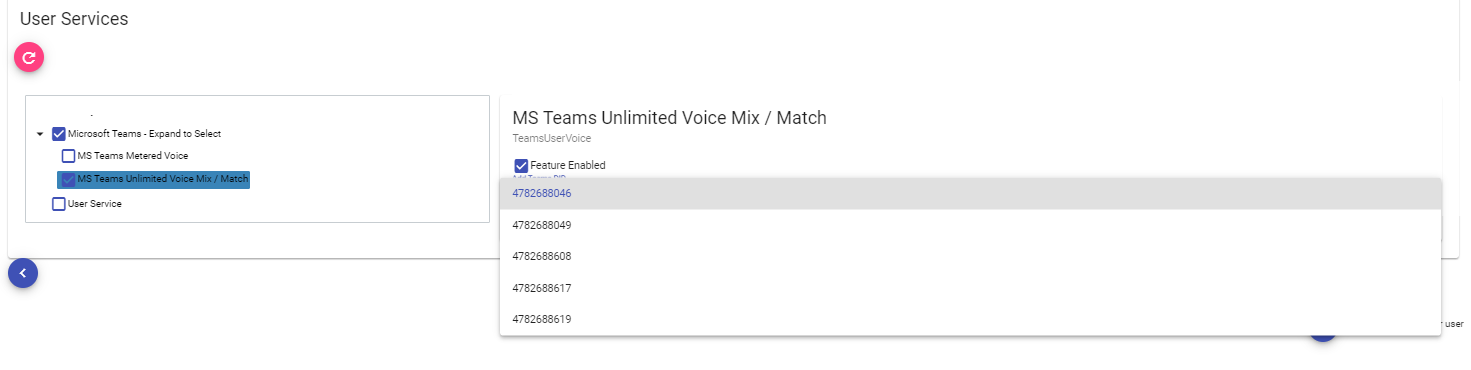
Assign the service and the phone number to the user account as shown in the screenshot below and select the plan you want either metered or unlimited and then the number from the drop-down list on the right.
Note: If no numbers appear on the drop down then the location is out of available numbers. You can order additional numbers by following our article, How to Order New Numbers.
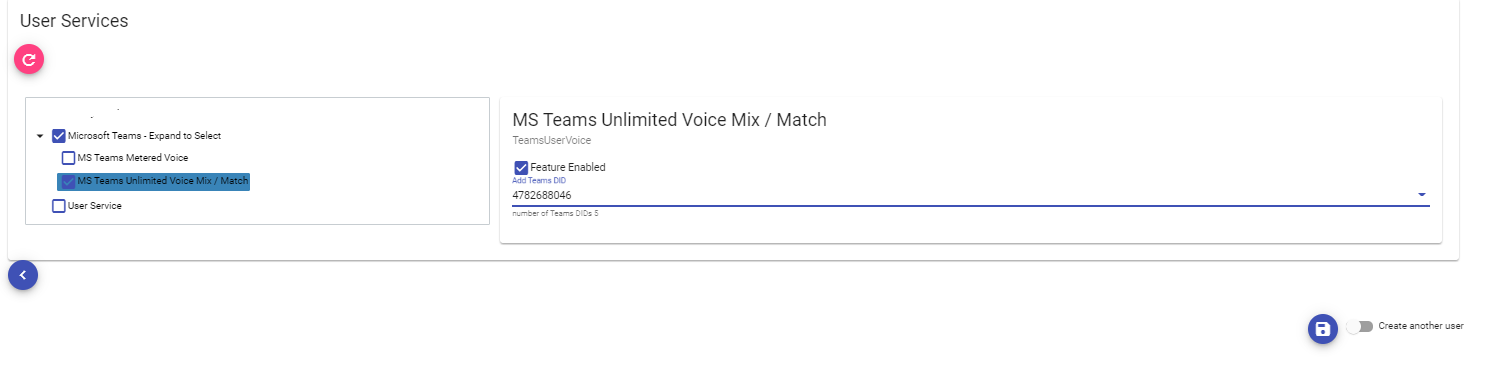
Click the blue Save button on the bottom right and your user will be created
Once the user is created you will see this banner at the top (it normally doesn’t take 24 hours for the calls tab to populate but provisioning time is 24 hours for changes to a user, hence the warning at the top)

Sync Users
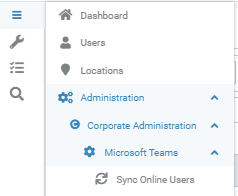
To create a user from Sync Online Users - Click on the ellipses at the top left and navigate to Sync Online Users
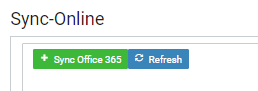
Please Note : the user will only show up in the Sync-Online if they have a first and last name filled out and they have a Microsoft 365 Phone System or Teams Phone Standard license assigned and no current phone number assigned.
Click the green Sync Office 365 to see the user

Click the blue pencil button on the far right and select the location the user will be in and click the green check mark

Click on the ellipses at the top left and navigate to the user icon and search for your user

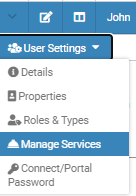
Click on the user and go to Manage Services under User Settings
Assign the service and the phone number to the user account as shown in the screenshot below, select the plan you want, metered or unlimited, and then the number from the drop-down list on the right
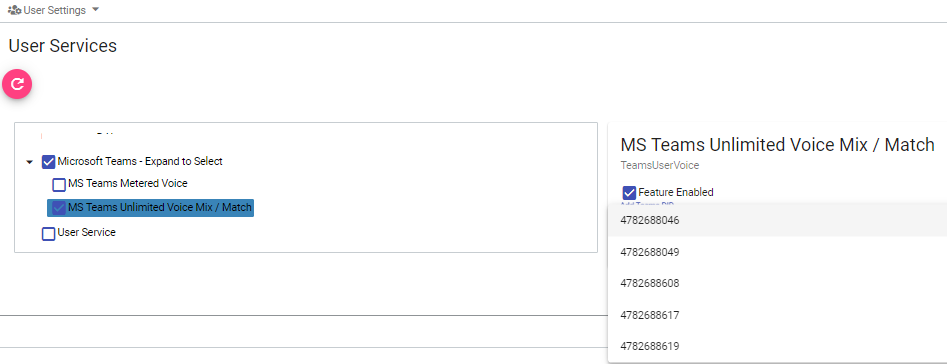
Click the blue Save button on the bottom right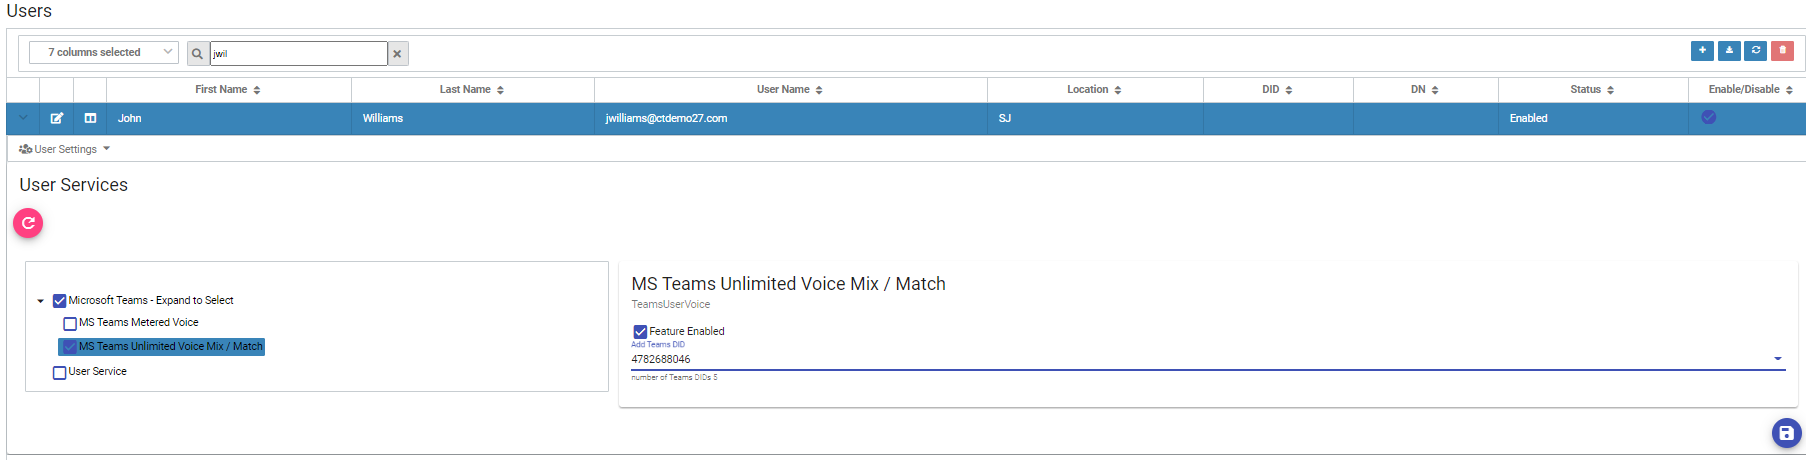
Once the number is added to the user then you will see this banner at the top (it normally doesn’t take 24 hours for the calls tab to populate but in the past, it has taken that long for Microsoft to populate it, that’s why we put that warning at the top)
Test the New User
Note: It can take up to 24 hours for proper replication. Changes should still be reflected in the Teams Admin Center.
1. Call the user's new number. It should ring voicemail or reach the end user. If this call is successful and reaches the endpoint, there is no need to continue.
2. Check the Teams Admin Center and ensure the user shows a DID assigned to the user. CallTower Support can do this if we are the CSP
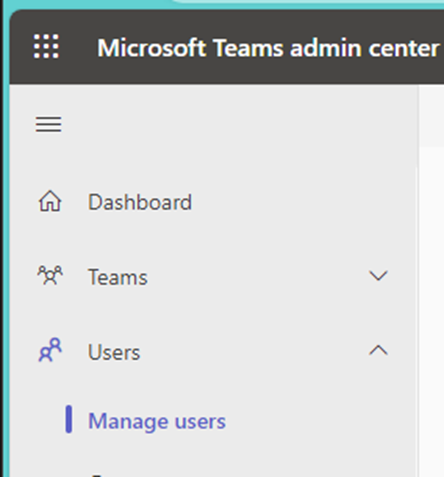
a. Log in to admin.teams.microsoft.com
b. On the left-hand side select Users > Manage Users
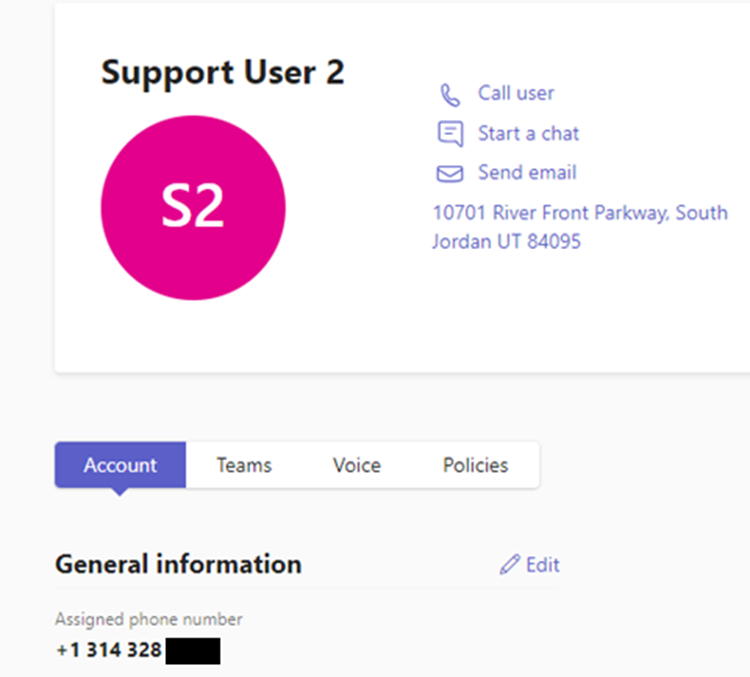
c. Select the user. The DID will appear under the “Account” tab under “General Information”
3. Lastly, we can remove the Teams Phone Standard licensing or Microsoft 365 Phone System Application and then re-assign it to the user.
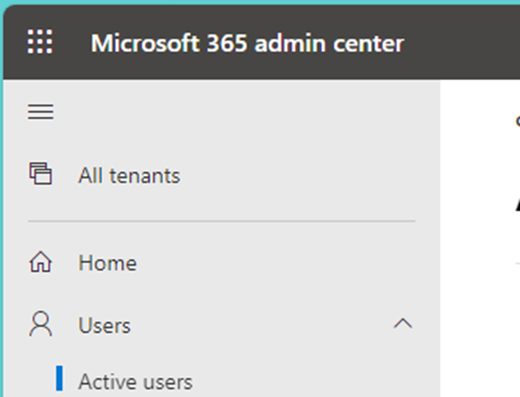
a. Sign in to Admin.microsoft.com. Navigate to “Users” > “Manage Users”
b. Find the affected user and select them. From the pop-out window on the right-hand side select the “Licenses and Apps” tab. Scroll down to find either “Teams Phone Standard” or “Microsoft/Office 365 E5”
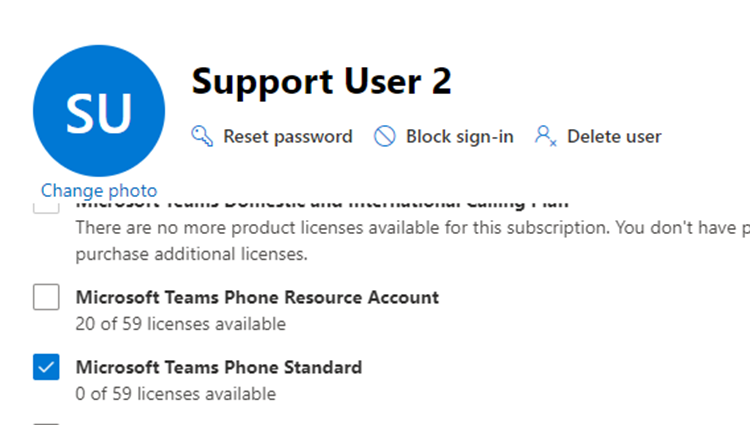
i. If the user is assigned a Teams Phone Standard license uncheck the box and save. Wait 30 minutes and reassign the licenses to the user.
ii. If the user is assigned an E5 license scroll down to apps at the bottom of the page and select the drop-down arrow 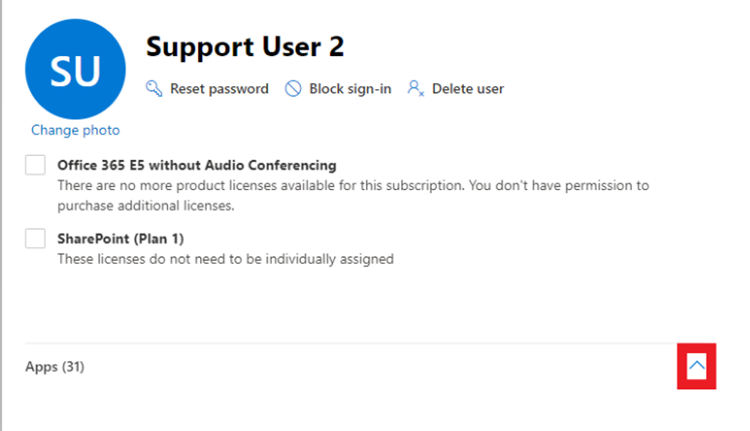
Scroll down to Microsoft 365 Phone System and uncheck the box. Save and wait 30 minutes before reapplying the app to the user.
c. Re-assign DID to the user.