MS Teams - Dynamic E911 Quick Setup Guide
Summary
This document will quickly guide you through configuring a single site. This guide is meant to configure a single central office location for Dynamic E911. It does not cover Nomadic e911, you can find more information about configuring Nomadic E911 in this Guide: MS Teams - Nomadic E911 Quick Setup Guide (External Lookup Mode) - CallTower Solutions Center (uc.solutions). It is recommended that you first configure your Dynamic E911 Office locations before enabling Nomadic E911 (External Look Up Mode).
There is a Video Guide also included in this document. This video can also be accessed through the table of contents on the right hand side.
Video Walkthrough
Direct Routing Customers Pre-Requisite -
- Browse to the Teams Admin Center
- Voice > Emergency Polices > Emergency call routing policies > Global
- Enable Dynamic Emergency calling
- For Direct Routing customers only, enter both 933 and 911 emergency dial strings as shown in the below screen shot.
NOTE: Operator Connect does not require the emergency numbers to be defined.
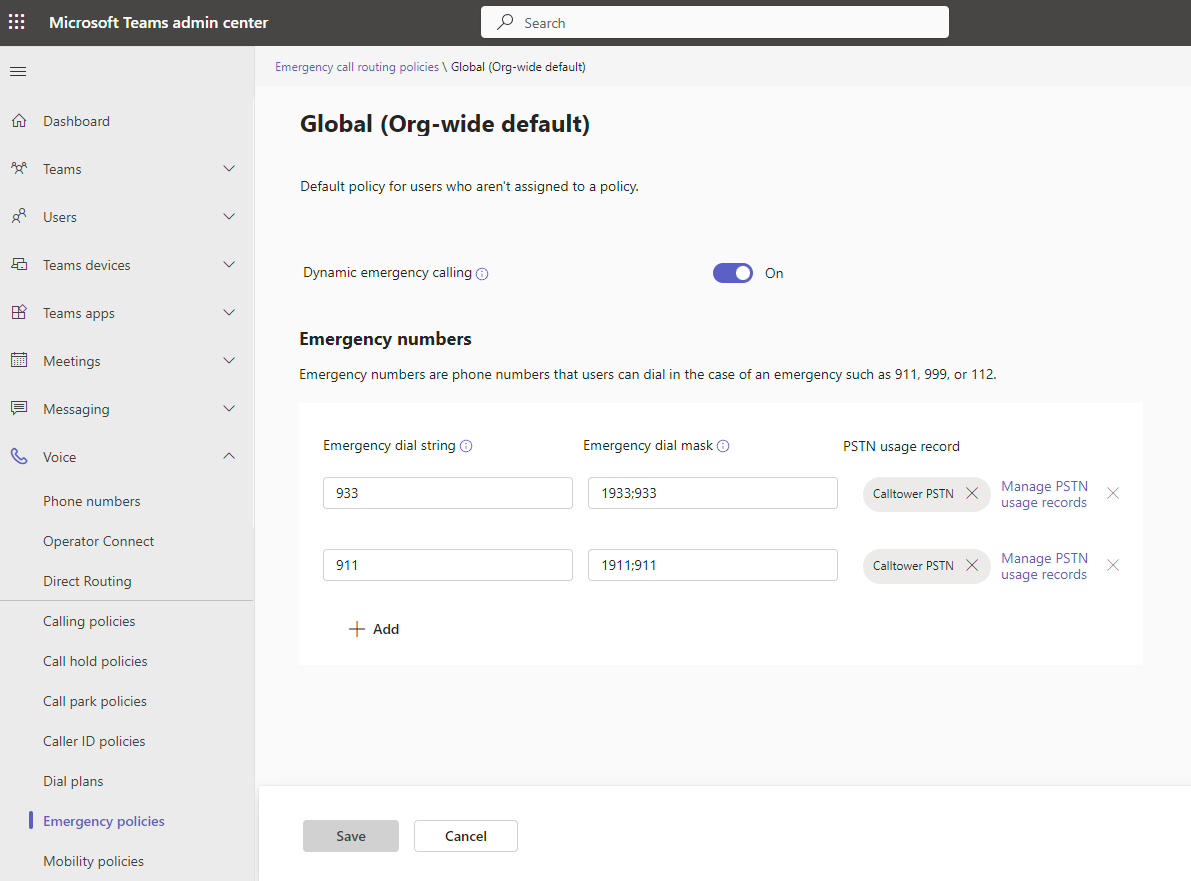
- 933 will give you the ability to test the address lookup without calling 911.
Emergency dial string: 933
Emergency dial mask: 1933;933
PSTN Usage: CallTower PSTN
Emergency dial string: 911
Emergency dial mask: 1911;911
PSTN Usage: CallTower PSTN
Step 1
Make sure the location services for Teams is turned on.
In Windows navigate to Location Privacy Settings and make sure that Teams is listed as shown below.

Step 2
Configure your Trusted IP's (Public IP/External IP):
- Browse to an External IP Lookup Site while on a computer at your configuring site. Below are some websites you can use to help.
- Make a note of the IP Address. Then Browse the Teams Admin Center
- Locations > Network Topology > Trusted Ips
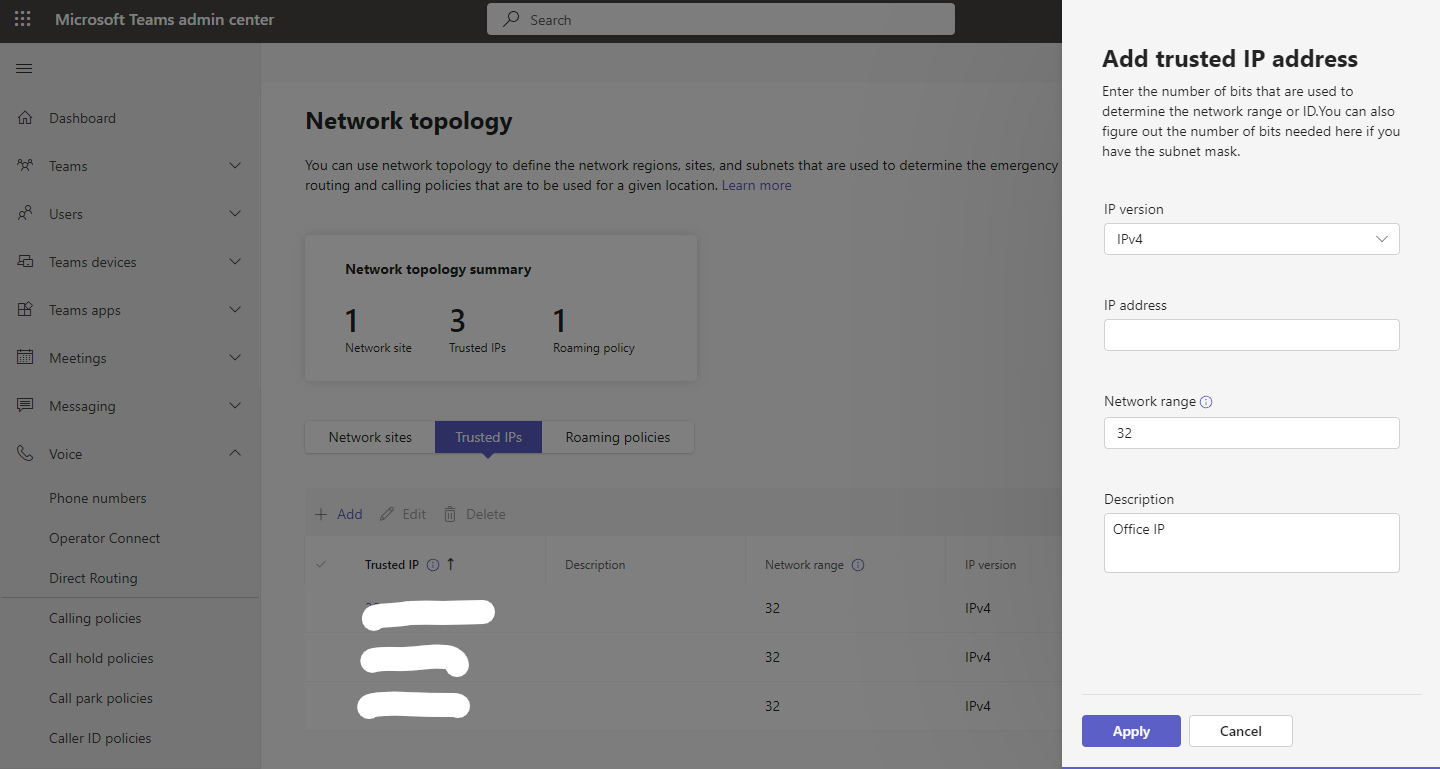
Enter the IP Address you got from the External IP service; use 32 for the network range unless your network team can give you the actual range of the network in use.
Step 3
Configure your Network Site:
- Browse to the Teams Admin Center. Locations > Network Topology > Network Sites
- Click Add.
- In the "Add name for your network site" field, enter the name of your location.
- Then Click on Add subnets:
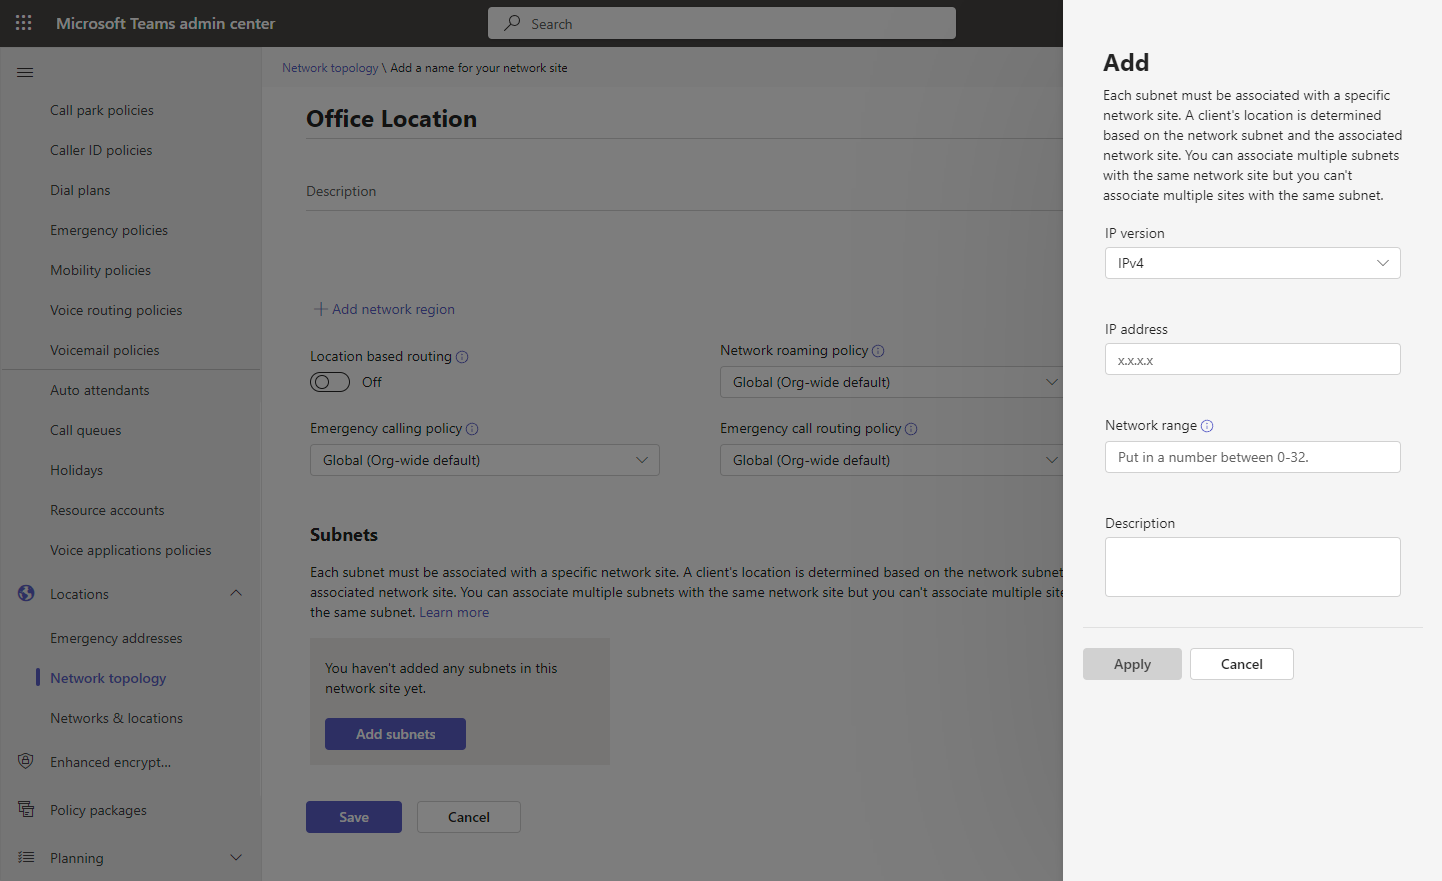
- Enter your local IP network and range here.
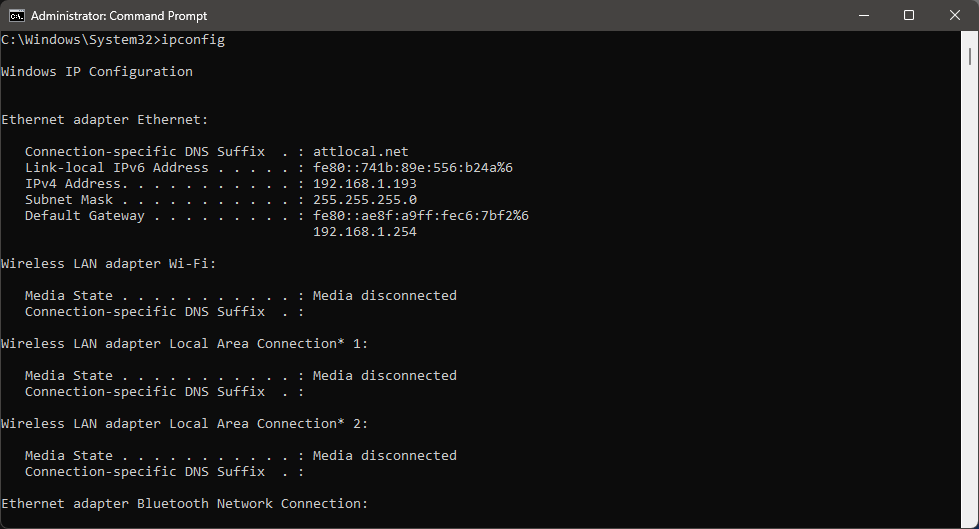
- You can use a Windows terminal to get this information.
- Right Click on your start menu, then select "Terminal."
- Type ipconfig
- Look for the connected adapter.
- Look for the IPv4 Address and Subnet Mask
- Right Click on your start menu, then select "Terminal."
- Browse to Calculator.net and put the values into the IPv4 Subnet Calculator
- IP Subnet Calculator
- Select the Subnet and put the IP address in.
- IP Subnet Calculator
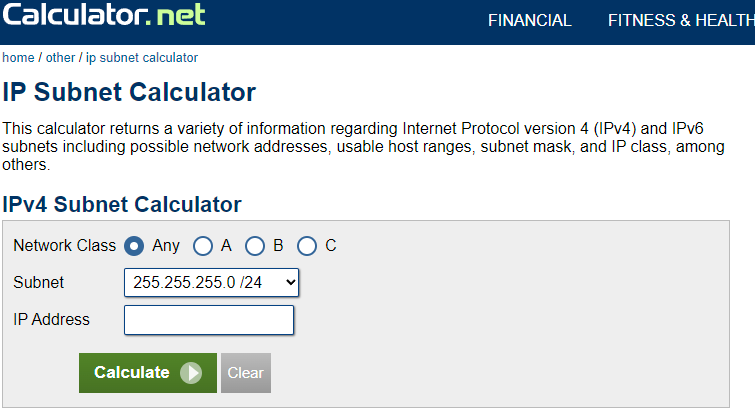
- Then, copy the network address from the results and use the CIDR Notation for the network range field.
- Apply and Save.
Step 4
Build Your Emergency Location:
(Skip this Step if you have already configured your emergency addresses)
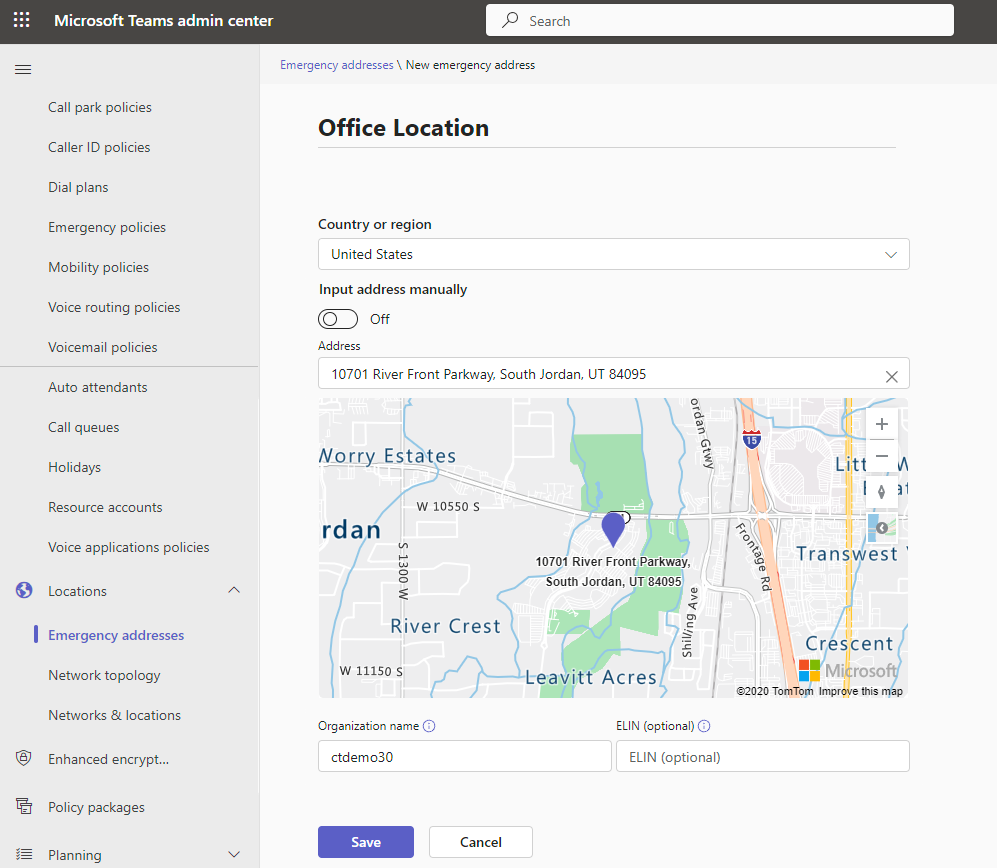
- Build your location in the Teams Admin Center
- Locations > Emergency addresses
- Click Add.
- Find the location details, then click Save
Step 5
Map your location to your subnet:
- From the Teams Admin Center, browse to Locations > Networks & Locations > Subnets
- Click On Add, then put in the Network Address from Step 3
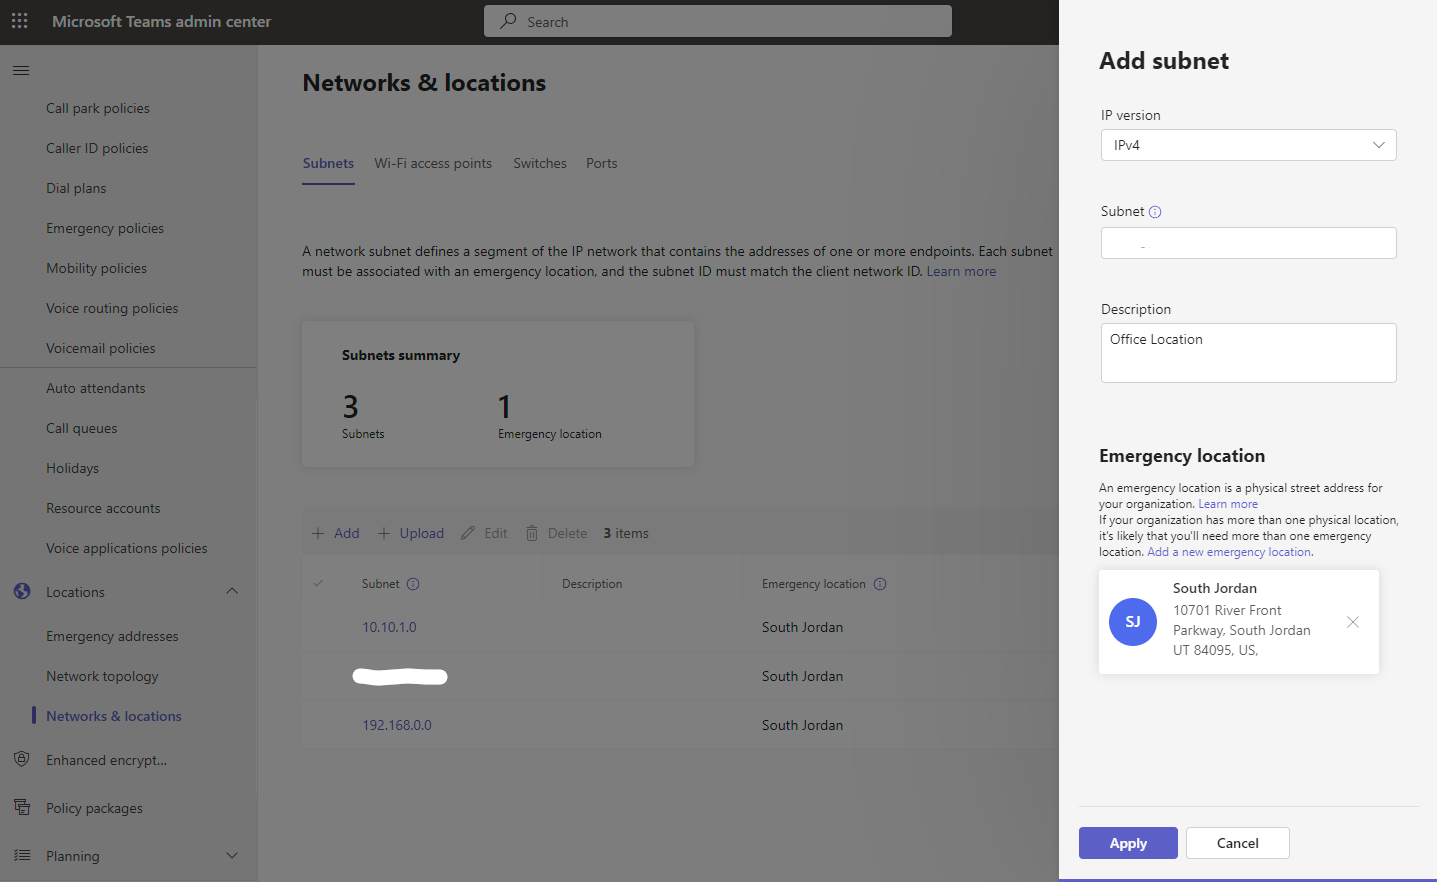
- Search for your network location, then click Apply.
Step 6
IMPORTANT NOTE: You will not be able to test this is working until you have been assigned a phone system license and phone number.
Restart and Test:
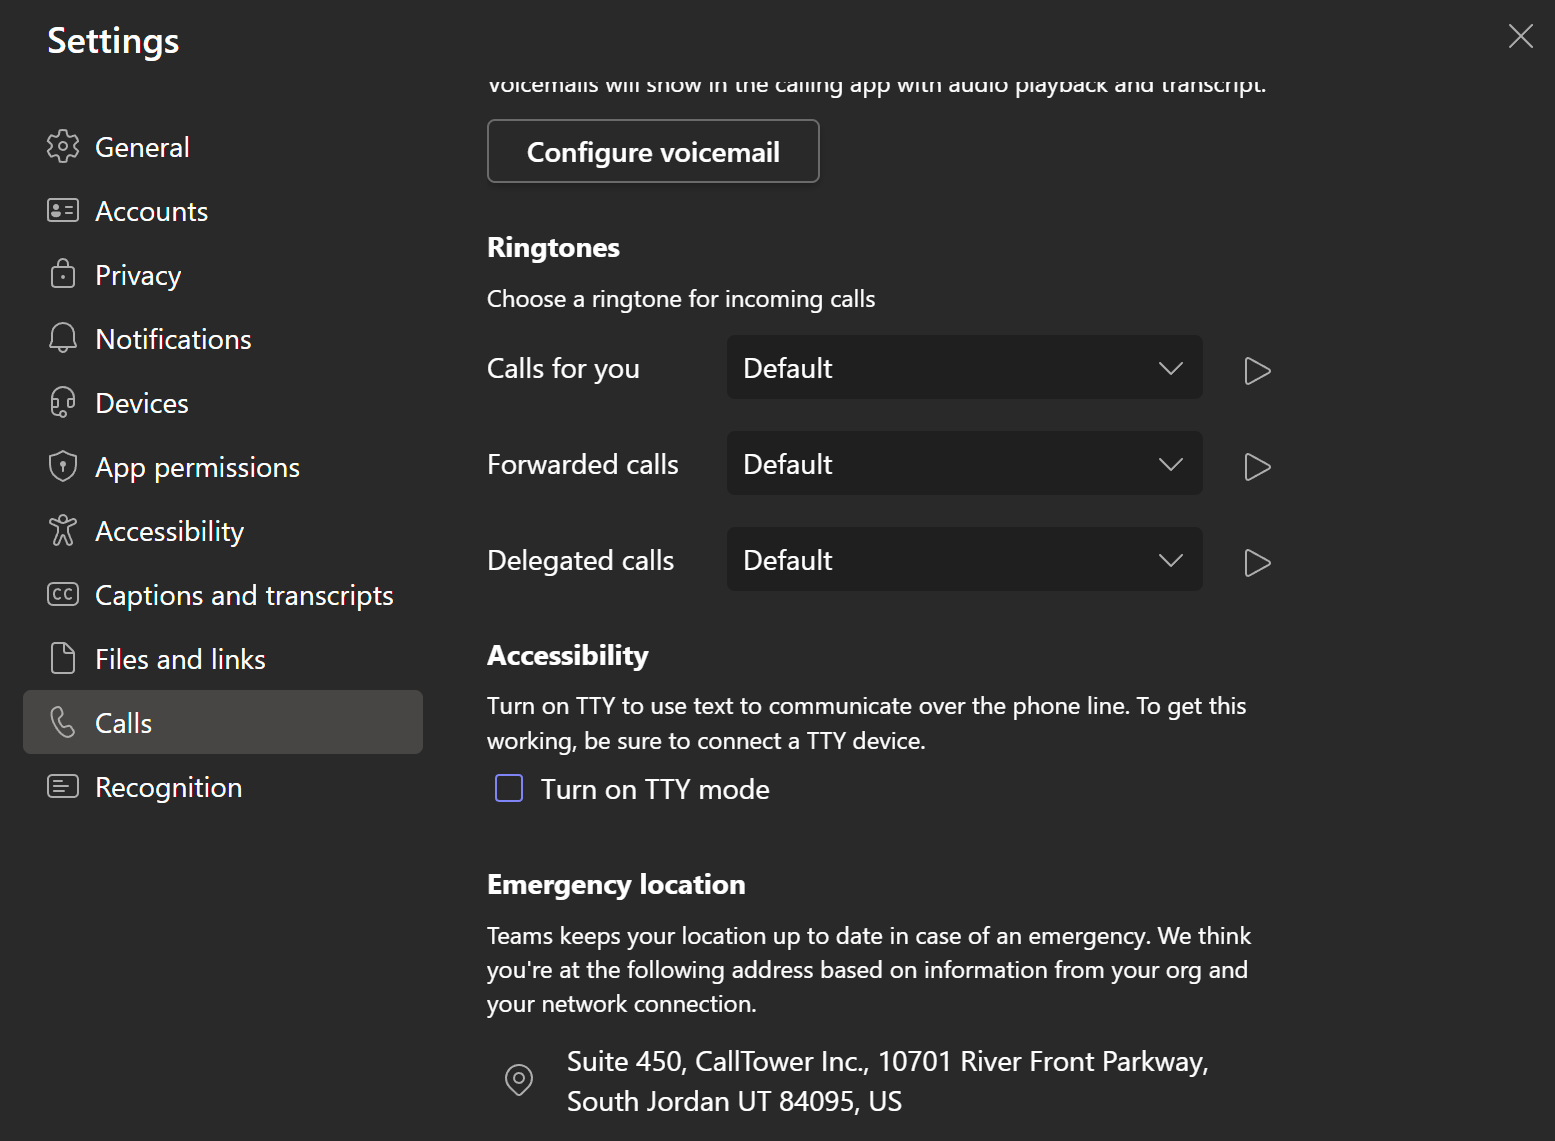
- Restart your Teams Client, then check if it detected the address correctly.
- On the upper right-hand corner, click the "…" menu, then Setting > Calls, and Look under the Emergency Location Header.
What's Next
You can repeat this process from any additional locations on your network. Please refer to the main guide for additional information, which this quick setup and test guide did not cover. Once you have configured your central office locations you can enable Nomadic E911, or "External Look Up Mode", see this guide to quickly enable External Lookup Mode for your remote employee's. MS Teams - Nomadic E911 Quick Setup Guide (External Lookup Mode) - CallTower Solutions Center (uc.solutions)
Test by dialing 933 and observing the address on the screen and played back in audio.
