Cisco Connect Admin - Auto Attendant Creation
Summary:
An Auto Attendant is a voice service that can have a few things like play a greeting, instantly transfer to another DID (phone number) on the account, give the caller options to choose, transfer to an extension’s voicemail, and much more. They can be complex or simple depending on how you would like them to be built.
Prerequisites:
You must have an available DID that is a “Cisco Voice Service” type. If you do not have one, you may open a case with CallTower Support to convert a DID of your choosing into one.

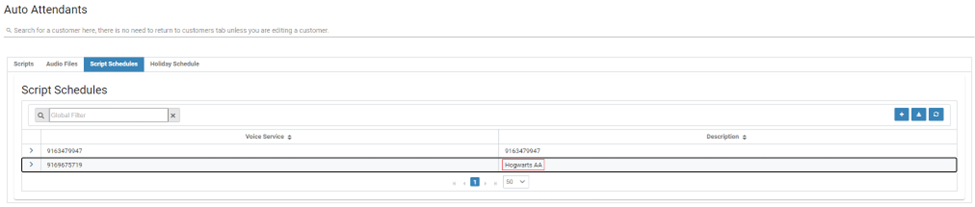
Creating A Script Schedule:
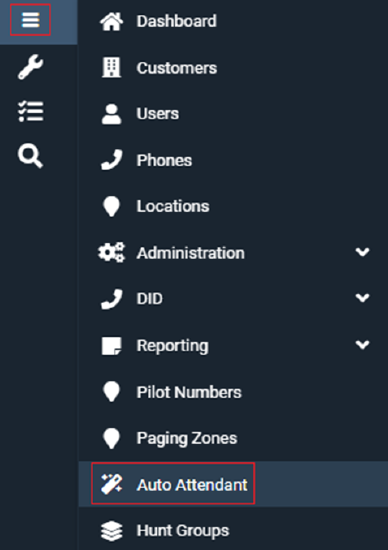
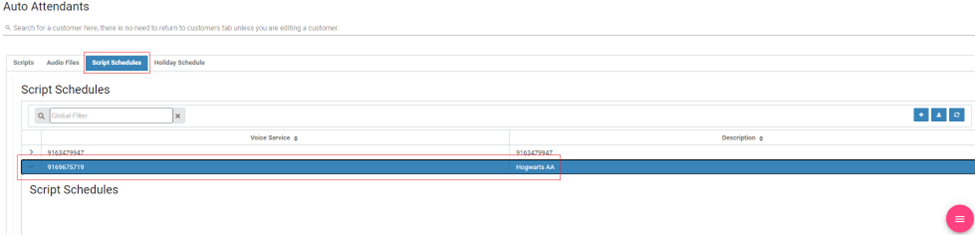
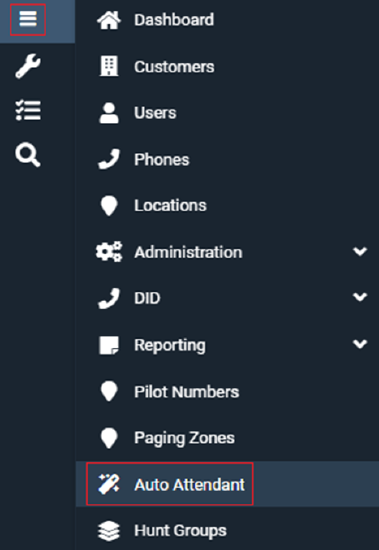
Once logged into CallTower Connect, navigate the following: Menu/Auto Attendant

Select the “Script Schedule” tab and click the “+” button to add a new Auto Attendant.

The below screen will pop up. Click on the drop-down menu for “Numbers” and select the DID you’d like to use for this Auto Attendant. After, fill out the line labeled “Description” with how you’d like to name this Auto Attendant. From there, hover over the menu and click on the floppy disk to save.

The Auto Attendant has now been created.
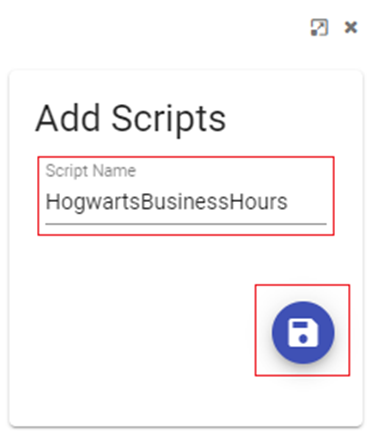
Build Scripts:
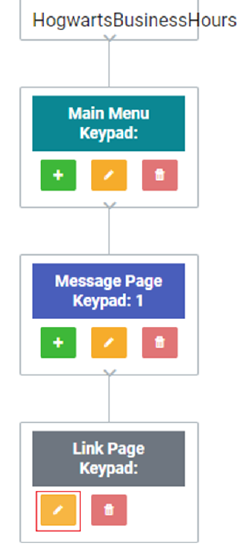
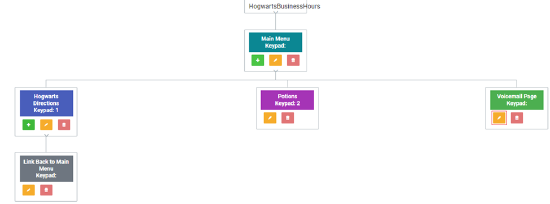
Click on the “Scripts” tab and the “+” button to start building the script for this Auto Attendant. Most accounts have two scripts per Auto Attendant (one for business hours and one for after-hours) but you can set yours up however you’d like. This article will go over a basic two-script Auto Attendant.

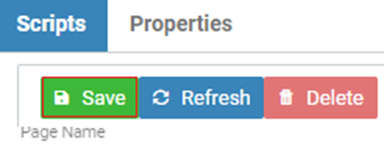
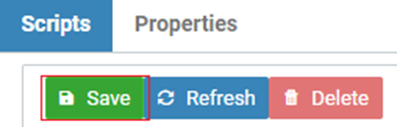
Name the script and save it by clicking on the floppy disk.
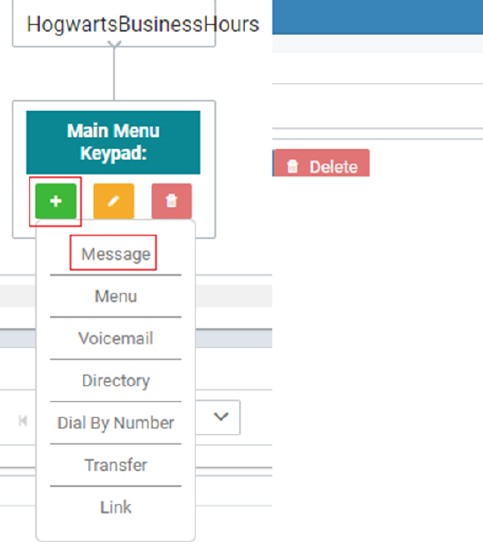
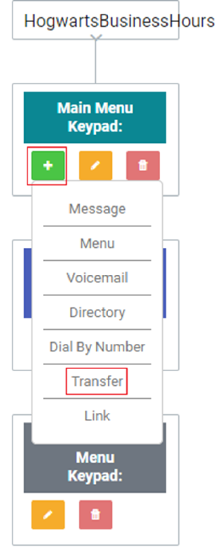
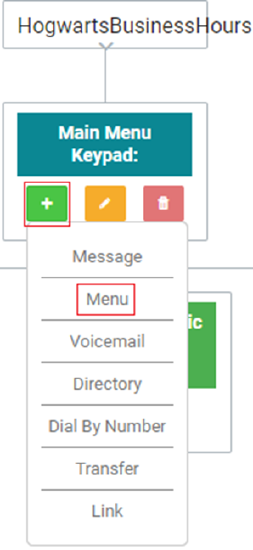
The below screen will show after expanding the script. Click on the “+” button to start adding other nodes to this script.
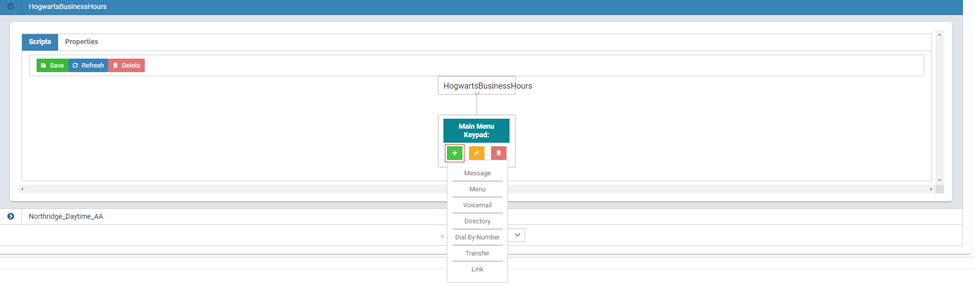
Message: This option will transfer callers to an audio message (such as directions, business hours, etc.) and must end with a link or another node.
Menu: This option will create another menu for callers and give them more options to choose from. This can be used for different departments, English/Spanish menus, and more. This must end with a Link or another node.
Voicemail: This option will transfer callers directly to a voicemail box of an extension of your choosing.
Directory: This option will transfer callers to a Dial by Directory where an automated voice will list out the users in the Directory of the account.
Dial By Number: This option will transfer callers to a Dial by Number where they can say or type in the person’s extension/first or last name of the person they are trying to reach if they know it. This will call the person’s extension directly if they are on the company’s directory.
Transfer: This option will transfer callers directly to another DID on the account. This can be a single person’s extension, an outside number not on the account, a Hunt Group, or another Auto Attendant.
Link: A link will bring the caller back to a node of your choosing. For example, linking a “Message” node that plays an audio file of directions would link back to the main menu after the message plays.
Script Proprieties:
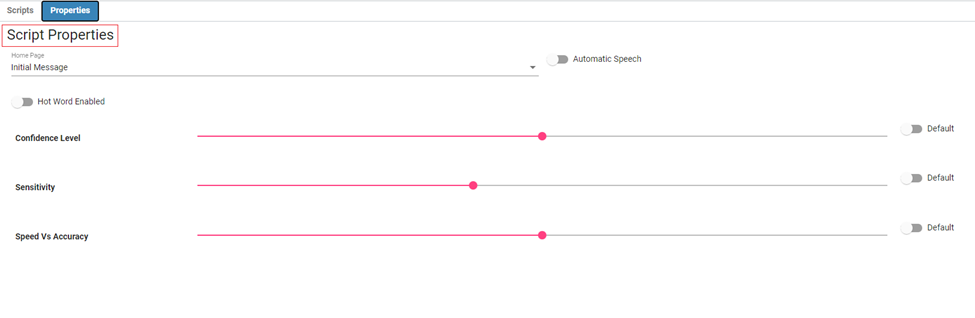
Home Page: The home page is defaulted to the initial greeting and you can set it to any configured page.
Automatic Speech: Allows speech commands based on keywords in the auto attendant
Hot Word Enabled: Auto attendant will only respond to configured commands
Confidence level: Default recommended
Sensitivity: Default recommended
Speed vs. Accuracy: Default recommended
Setting the default slider to Default and saving sets the option back to the recommended default value.
Record And Upload Audio Files For The Script:
To record an audio file, call 415-869-8961 to leave a message. If there are multiple audio files, you need to call again to make a new recording. You must then open a case with CallTower Support asking to upload those files. In the case, mention the date and time the message(s) were uploaded.
Alternatively, you may record and upload your own files. Please keep in mind that the files must be 16-bit wav files. After recording and trimming your audio file, navigate the following in Connect: Menu/Auto Attendant/Audio Files/+ Choose
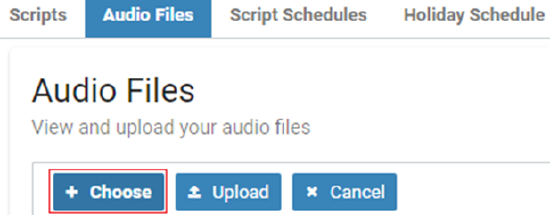
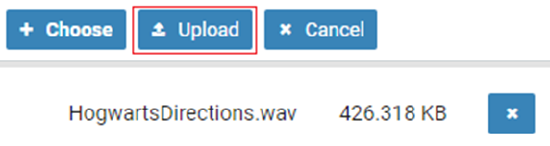
After selecting your file, you may click “Upload”.
Add An Audio Message/Directory To Main Menu:
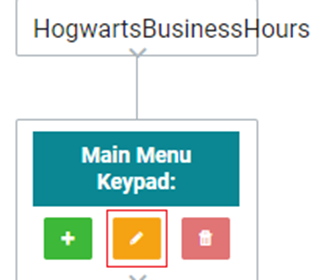
On the Main Menu node, click on the pencil button to edit.
Click on the drop-down for “Audio File” and select the wav file you’d like to have for the Main Menu greeting. This greeting could include business hours, what options are on the audio attendant (for directions, press 1, etc.), and more.
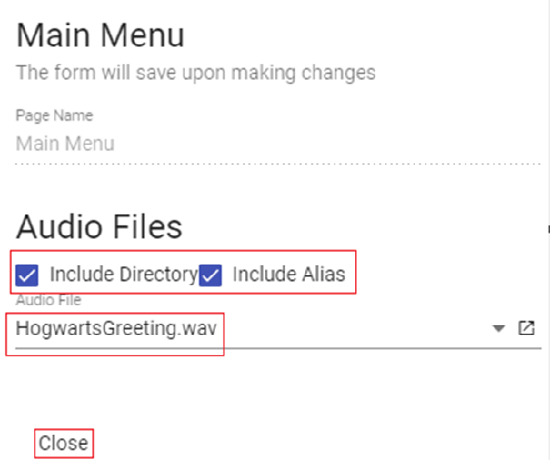
You can also click the boxes for “Include Directory” and “Include Alias” to have the caller say a name in the directory at any time to call that name’s extension. This option is live once the boxes are checked but the caller won’t know about them unless the audio greeting informs them of it.
Select “Close” and save your script.
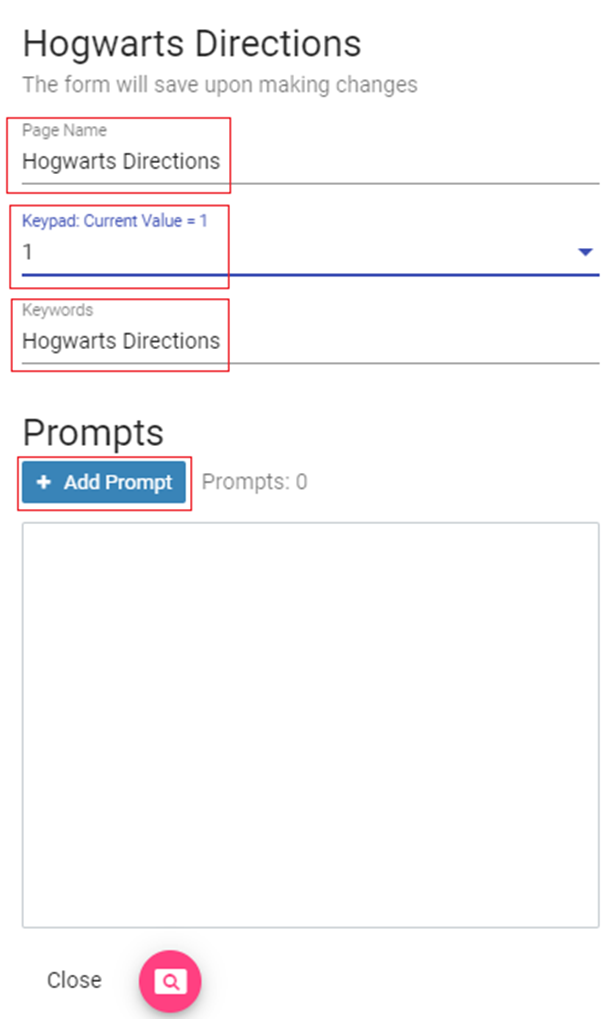
Add A “Message” Node To Script:
Expand your script and on the Main Menu node, click the “+” button and select “Message”.
Click on the pencil button on the Message node to edit it.
Fill out the lines for “Page Name” and “Keywords”. Select the drop-down menu for “Keypad: Current Value” and click on the option you’d like callers to pick to reach this Message node. After this is all filled out, click on the “+ Add Prompt” button.
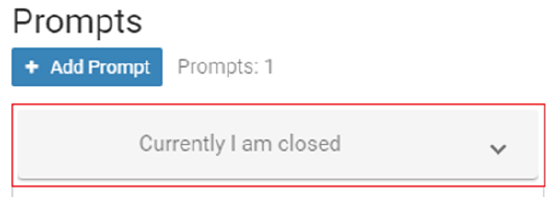
Click on the “Currently I am close” box to expand it.
Type: Audio
Audio File: Select the audio file for this node. In this case, it will be an audio file containing the address of this location.
Schedule: Always. You can set this to other schedules on the list but for the purpose of keeping this simple, we will choose Always.
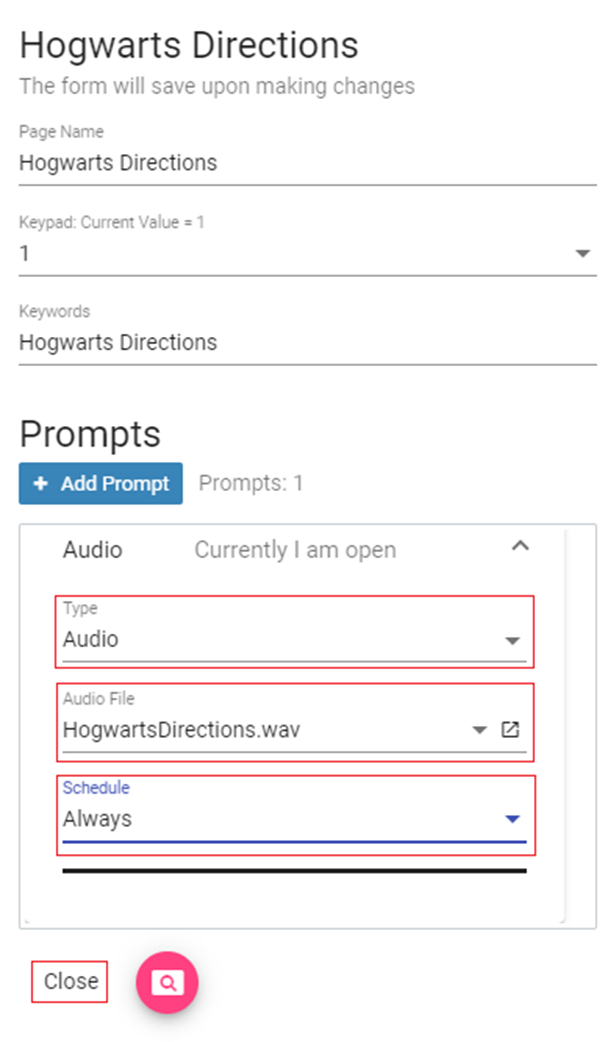
Select “Close”. On the Message node, click the “+” button and select the “Link” option.
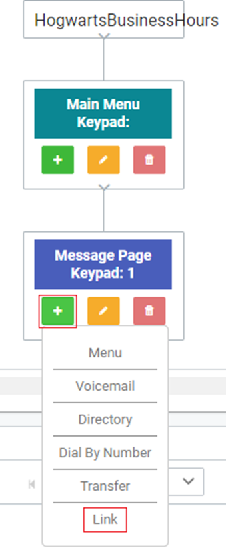
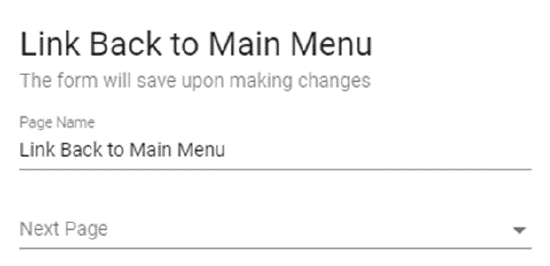
Select the pencil button on the Link node.
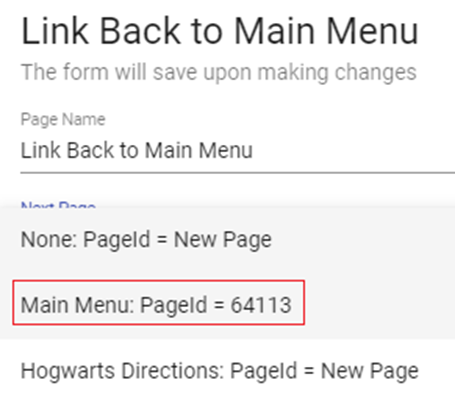
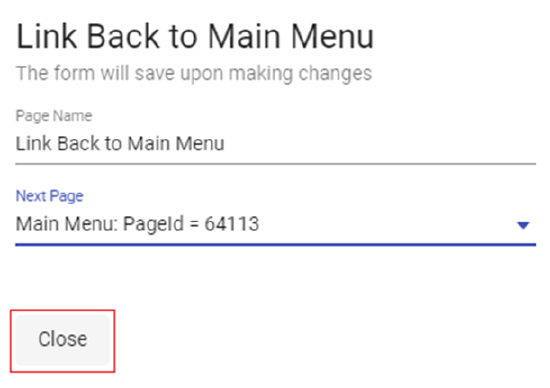
The below screenshot will show, how you can rename the “Page Name” if you’d like to. Select the drop-down for “Next Page” to link this back to a node. Selecting the Main Menu will link the caller back to the Main Menu after the audio message plays for the Message node.
Select “Close” and save on the top left to complete this Message node.

Add A “Transfer” Node To Script:
From the Main Menu, click on the “+” button and select “Transfer”.
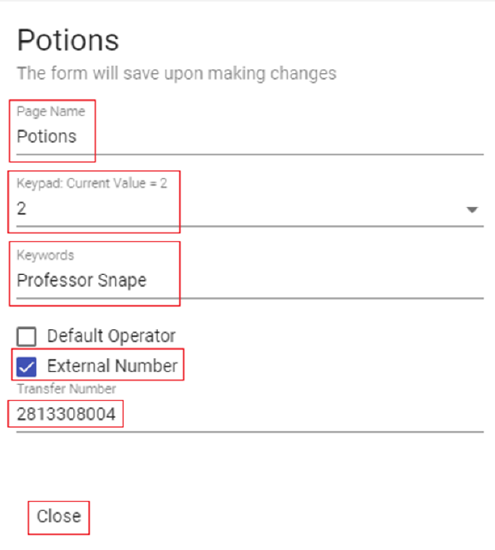
Click on the pencil button on the Transfer node to edit it.
Fill out the “Page Name”, select the option from the drop-down menu for this Transfer node, “Keywords”, check “External Number” and fill out the number for “Transfer Number”. The Transfer Number can only be 10-digits long or can be the extension of someone on the account with a Cisco DID. When a caller selects this option from the Main Menu, they will be transferred to that number.
Select “Close” and save your script.
Add A Voicemail Node To Script:
From the Main Menu, click on the “+” button and select “Voicemail”.
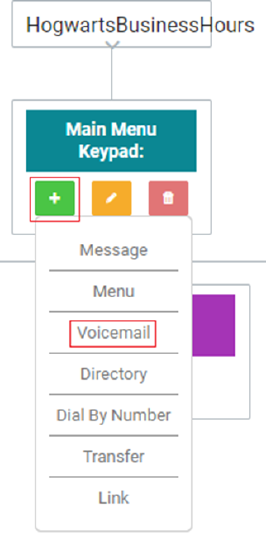
Click on the pencil button on the Voicemail node to edit it.
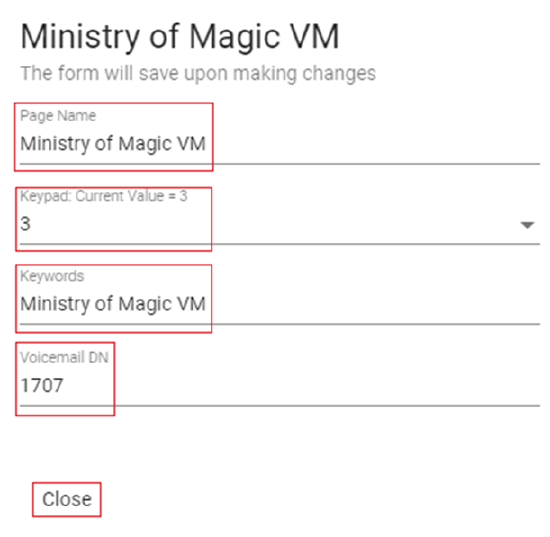
Fill out the “Page Name”, and select the option from the drop-down menu for this Voicemail node, “Keywords”, and “Voicemail DN”. The Voicemail DN is the directory number/extension of a user on the account. This option will transfer callers straight to that person’s voicemail inbox to leave a message.
Select “Close” and save your script.

Add A Directory Node To Script:
From the Main Menu, click on the “+” button and select “Directory”.
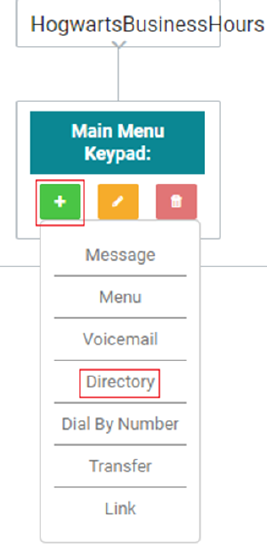
Click on the pencil button on the Directory node to edit it.
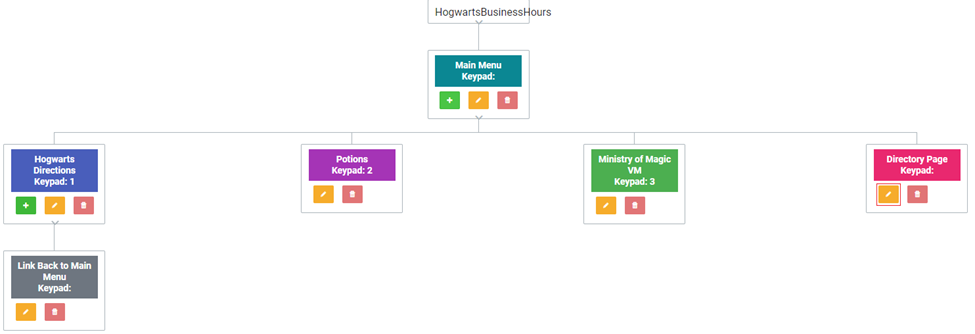
Fill out the “Page Name”, select the option from the drop-down menu for this Directory node, and “Keywords”. When callers select this option, they will be greeted by an automated voice listing every user on the Directory for the caller to pick from and call.
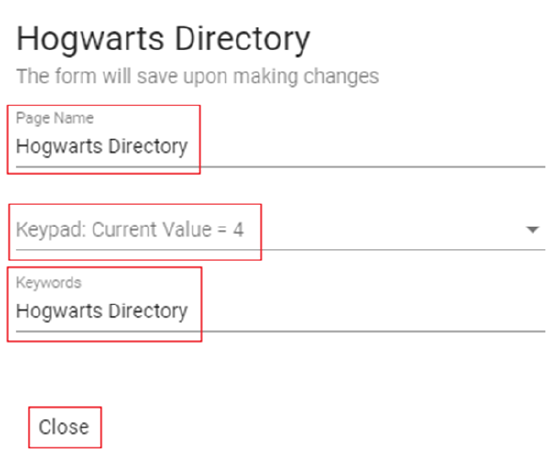
Select “Close” and save your script.

Add A Dial By Number Node To Script:
From the Main Menu, click on the “+” button and select “Dial By Number”.
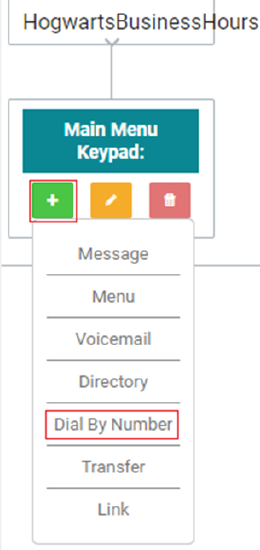
Click on the orange pencil button on the Dial By Number node to edit it.
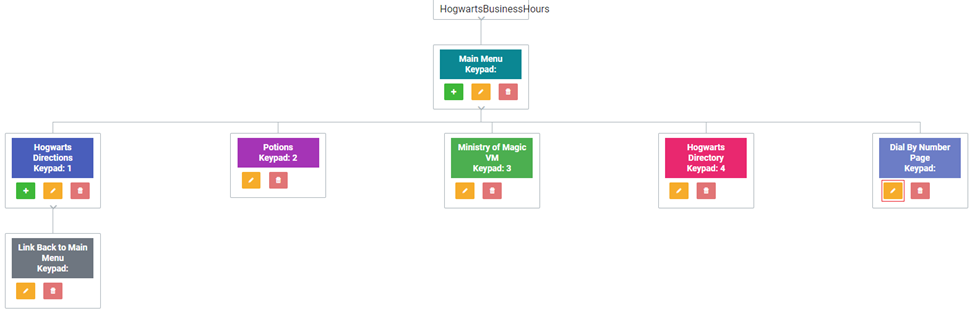
Fill out the “Page Name”, select the option from the drop-down menu for this Dial By Number node, and “Keywords”. When callers select this option, they will be greeted by an automated voice asking them to type or say the person’s extension or name to call them directly.
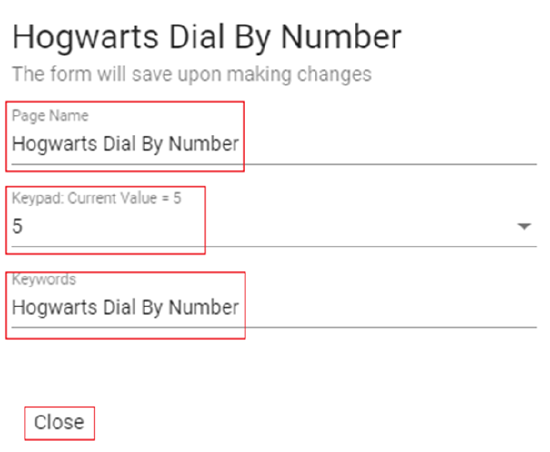
Select “Close” and save your script.

Add A Menu On Script:
From the Main Menu, click on the “+” button and select “Menu”.
Click on the pencil button on the Menu node to edit it.
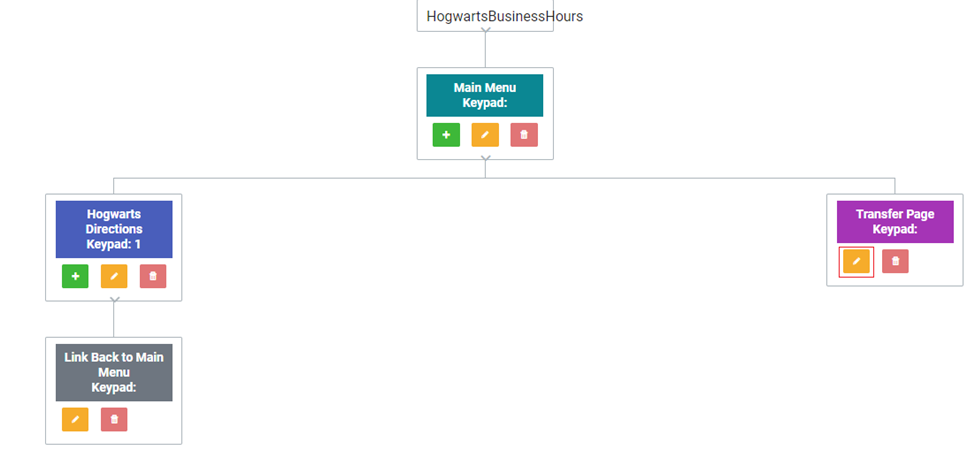
This Menu node will act like a brand-new sub-menu that will also have an audio greeting you may upload. This node will have the same options to choose from the above options. As mentioned before, this menu node can be for different departments or for another language of the same menu.
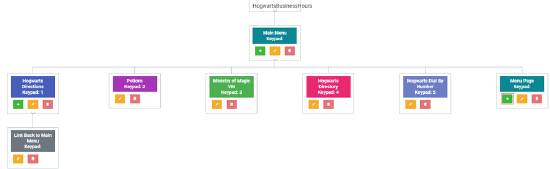
Below is an example of how it would look like.

Create An After-hours Script:
Follow the above steps to create a second script for after-hours. This script will automatically be swapped after a certain time or day depending on how you would like this setup. Most accounts usually transfer callers to a voicemail inbox or to an after-hours line.
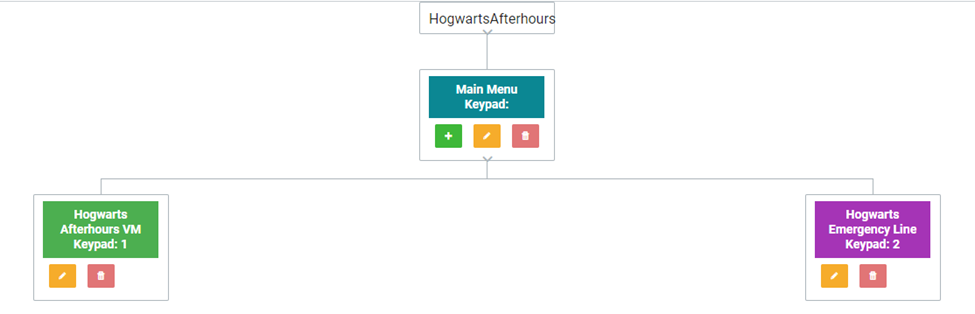
Below is an example of what an after-hours script might look like.
Setup A Schedule For Auto Attendant:
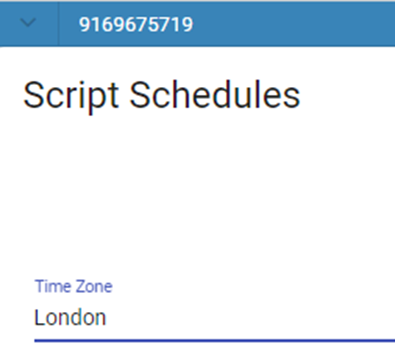
Navigate the following in Connect: Menu/Auto Attendant/Script Schedule/Expand Schedule

Select your time zone by clicking the drop-down for “Time Zone” and choosing the time zone that is for the location of this auto attendant.
After, you can start setting up the start and end times of your Auto Attendant by selecting “Start Time”, “End Time”, “During Business Hours”, and “Outside Business Hours”. This is done on a day-by-day basis. If you select “All Day” and check the box for it, this will play whatever script you choose to play all day on that day.
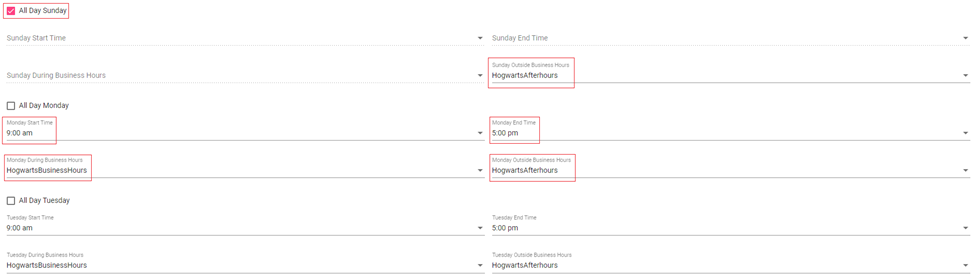
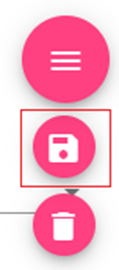
After selecting the times and what scripts play during those days, you may save your settings.
Setup A Schedule For Auto Attendant On HCS:
Navigate the following in Connect: Menu/Auto Attendant/Unity Schedules/Expand Schedule

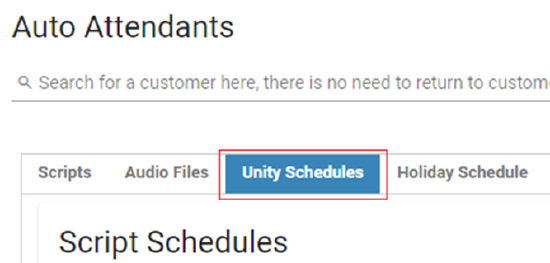
Select the drop-down menus and make your selections for “Open”, “Close”, and “Time Zone”.

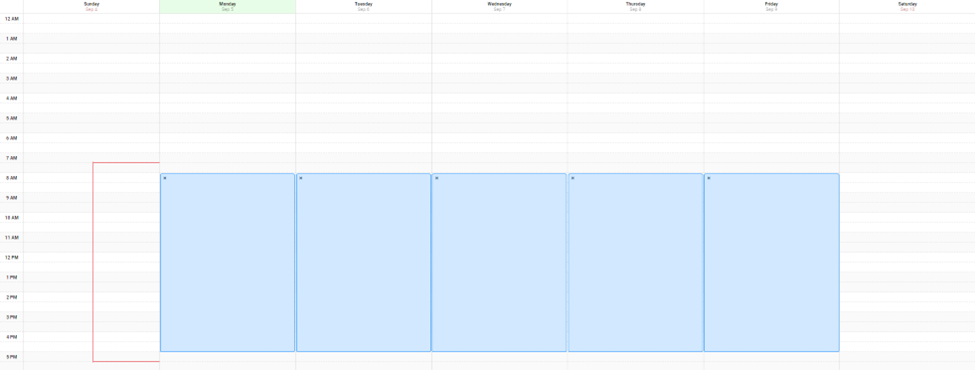
From there, you can click and drag a selection that you would like the “Open” script to play. You do this for each day if needed. Everything in the blue selection will play the “Open” script and everything else blank will play the “Close” script.
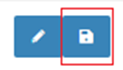
Click the floppy disk on the top right to save.
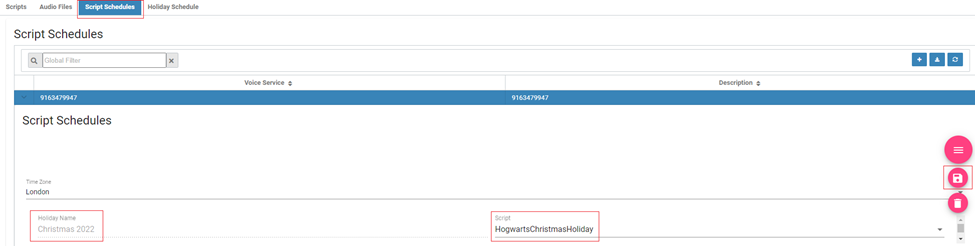
Add A “Holiday Schedule” To Auto Attendant:
Navigate the following in Connect: Menu/Auto Attendant/Holiday Schedule/+ Button to add

After clicking on the “+” button, the below screen will show. Fill out the “Holiday Name”, “Start Date”, and “End Date”. Having the same day for both Start and End dates will run the chosen script for 24 hours or the whole day. Click on the floppy disk to save.

Click on the “Script Schedule” tab and expand the Auto Attendant you’d like to add a holiday schedule. Find the holiday by name and select what script you’d like to add to the holiday and save.
This Holiday Schedule will only run on the designated day(s) and automatically switch back to the normal schedule and scripts.