TSE Steps to Configure a Polycom TRIO 8800
*Note: These phones will always be added as “Third Party SIP Device”. Then the rest of the options will only have 1 option in the Phone Configuration. You will need to be sure to build it in the correct location of the company.
On this model phone you have to enable the HTTP menu before you can configure it via a web Browser.
From the main menu, press the settings icon, and then press advanced from the settings menu. Enter ‘456’ from the keypad as the password, and then press done.
Select administration settings, and then scroll down to web server configuration.
Press the switch to turn on the web server, then press web config mode, and select http only from the menu.
Press the back button on the bottom left and corner of the display, and then press save config.
Once the phone is done rebooting to the main screen press the “settings” icon. From the settings menu press the status option, then press network, followed by TCP/IP parameters. Within that menu you can take note of the IP Address.
In a browser (Preferred Google Chrome) browse to the IP Address. Example: 10.253.7.223
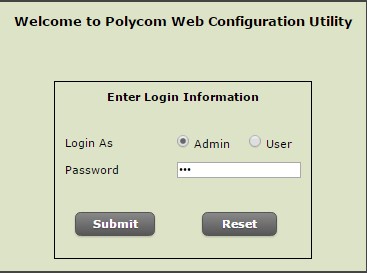
The Admin radio button should be checked under Login as. The password is ‘456’
Profile provisioning.
- Using the menu browse to Simple Setup. Expand the Base Profile menu. Select Generic in the Base Profile drop down menu, and click save.
SIP provisioning.
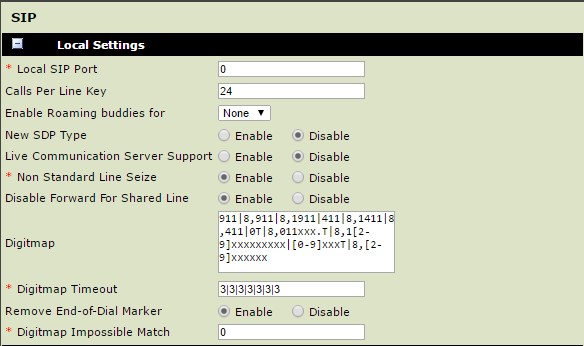
Using the menu browse to Settings, and then SIP. Expand the Local Settings menu. Fill in the settings as shown in the image below with the following exceptions.
- Digitmap: The preceding has been provided for the convenience of copying and pasting into the digit map window. The first option is if the customer uses 8 as a dial out digit. The second option is if the customer uses 9 as a dial out digit. Ensure that there are no leading or trailing spaces when you copy and paste.
911|8,911|8,911|411|8,1411|0T|8,011xxx.T|8,1[2-9]xxxxxxxxx|[0-9}xxxT|8,[2-9]xxxxxx
911|8,911|8,911|411|8,1411|0T|8,011xxx.T|8,1[2-9]xxxxxxxxx|[0-9}xxxT|8,[2-9]xxxxxx
- Digitmap Timeout: The preceding has been provided for the convenience of copying and pasting into the digit map window. Ensure that there are no leading or trailing spaces when you copy and paste.
3 | 3 | 3 | 3 | 3 | 3| 3 | 3 | 3 | 3 | 3 | 3
- Click save at the bottom right hand corner of the screen.
Line provisioning.
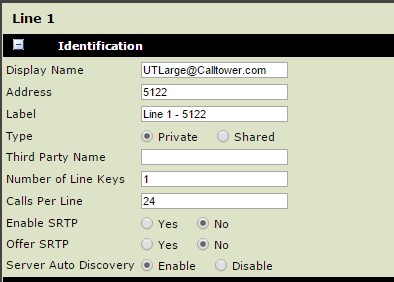
Using the menu browse to Settings, and then Lines. Expand the identification menu. Fill in the settings as shown in the image below with the following exceptions.
- The display name will be the username that you built the phone under.
- Address will be the DN that you built the phone under.
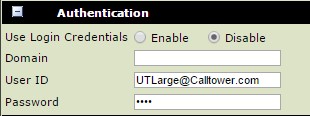
Expand the Authentication menu. Fill in the settings as shown in the image below with the following exceptions
- User ID will be the username that you built the user as. Note that CUCM truncates it to 30 characters if your username is longer than 30 characters.
- Password will always be ‘12345’
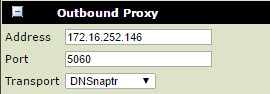
Expand Outbound Proxy fill in the settings as shown in the image below with the following exceptions
- Address will be the IP address of the UT subscriber of the cluster that the phone was built on
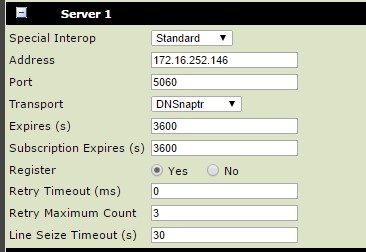
Expand Server 1, fill in the settings as shown on the image below with the following exceptions
- Address will be the IP address of the UT subscriber of the cluster that the phone was built on.
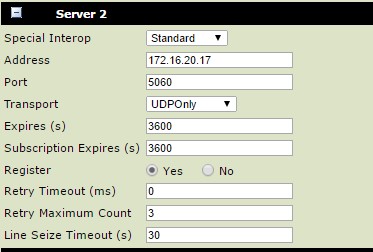
Expand Server 2, fill in the settings as shown on the image below with the following exceptions
- Address will be the IP address of the SF subscriber of the cluster that the phone was built on.
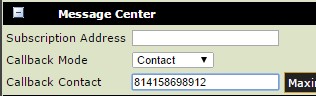
Expand Message center. Fill in the fields as shown in the image below with the following exceptions.
- Callback contact will be 81[customer’s voicemail pilot number]
Click Save at the bottom right hand corner of the page, the phone will reboot.
Time provisioning.
Using the menu browse to Preferences, and then Time. Expand the identification menu. Fill in the settings as shown in the image below with the following exceptions.
Time format should be customer’s preference.
Date Format should be customer’s preference, and will likely be based on the country they are based in. Most US based phones should be ‘Mon, Jan 1’

Click Save at the bottom right hand corner of the page, the phone will reboot.