How to Create an OFFICE 365 Exchange Mailbox for Polycom TRIO
Prerequisites
- Create a Skype for Business account in CallTower Connect to be used for the Conference Room. It must be configured as an Enterprise Plus Voice account to have full functionality for the Trio. Note the password assigned
- Create the Exchange mailbox in Office 365 – see below
- Match the username and password of the Exchange mailbox to the Skype for Business account that you created in the previous step - the login and password must be the same for both.
- Add the Trio to the CallTower Polycom Provisioning Server and login to Skype - refer to other document. You'll use the same username and password from above and this reinforces why you must have the same username and password for both the CallTower Skype for Business account and the Office365 Exchange mailbox - because the Trio only lets you log in once and will use the same credentials to access both systems.
Software Installation
- Download and install the 64-bit version (msoidcli_64.msi) of the Microsoft Online Services Sign-in Assistant.
- Download and install the Windows Azure Active Directory Module for Windows PowerShell.
Open the Windows Azure Active Directory Module for Windows PowerShell (As Administrator) and run the following command. Replacing the highlighted example user account name with the desired administrator account for the appropriate Office 365 tenant (e.g admin@mycompany.onmicrosoft.com)
Set-ExecutionPolicy RemoteSigned

$credential = Get-Credential admin@domain.com
Import-Module MsOnline
Connect-MsolService -credential $credential
$exchSession = New-PSSession -ConfigurationName Microsoft.Exchange -ConnectionUri https://outlook.office365.com/powershell-liveid/ -Credential $credential -Authentication Basic -AllowRedirection
Import-PSSession $exchSession -DisableNameChecking
To validate a successful connection to the services run the following basic cmdlets to verify AD, Exchange.
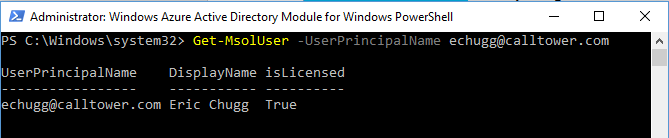
Get-MsolUser –UserPrincipalName user@domain.com
Get-Mailbox user@domain.com

Create Exchange Room Mailbox
Using either the same or a new PowerShell session as established in the previous section define a new variable to store the desired User Principal Name for the new meeting room account and then create the new room mailbox.
- Replace the text in blue below with the desired details for the new meeting room and then issue the following New-Mailbox cmdlet to create a new Room mailbox and enable the account to allow authentication.
$newUser="conference@ctdemo06.com"
New-Mailbox –MicrosoftOnlineServicesID $newUser -Name "Conference Room" -Room -RoomMailboxPassword (ConvertTo-SecureString –String "Calltower1" -AsPlainText -Force) -EnableRoomMailboxAccount $true

It may take several seconds for this cmdlet to return any results and may also even report a replication request failure. This is normal as it can take up to 15 minutes before the mailbox provisioning is completed in Exchange Online. There is no need to wait that long though to complete the rest of the Exchange Online configuration steps.
- Run the following Set-CalendarProcessing cmdlet to modify some of the default behaviors of a standard resource mailbox which are critical to providing the proper in-room join experience
Set-CalendarProcessing -Identity $newUser -AutomateProcessing AutoAccept -AddOrganizerToSubject $false -RemovePrivateProperty $false -DeleteComments $false -DeleteSubject $false –AddAdditionalResponse $true –AdditionalResponse "Your meeting is now scheduled and if it was enabled as a Skype Meeting will provide a seamless click-to-join experience from the conference room."

An optional step is to disable password expiration on this new account. By default, as with any AD account, the password defined in a previous step will automatically expire based on the account’s inherited password policy. When dealing with shared meeting devices it may not be desirable to be forced to administratively update the account’s password within that interval.
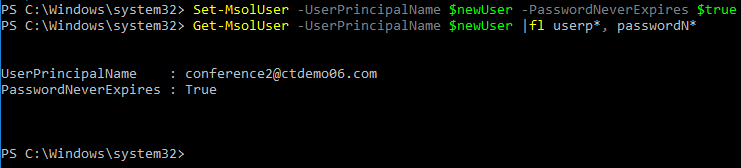
- To set the new account’s password to never expire simply run the following Set-MsolUser cmdlet and then optionally run the Get-MsolUser cmdlet to verify the change.
Set-MsolUser -UserPrincipalName $newUser -PasswordNeverExpires $true
Get-MsolUser -UserPrincipalName $newUser |fl userp*, passwordN*