Cisco Connect Admin - Create A Common Area Phone
GOAL
This article is to go over how you can add a common area phone in Connect or to change and existing available phone to a common area phone.
Method 1: Adding a New Common Area Phone
1. Log in to the Admin Portal.
2. Navigate to the Menu >> Phones and select the plus sign at the top of the screen.
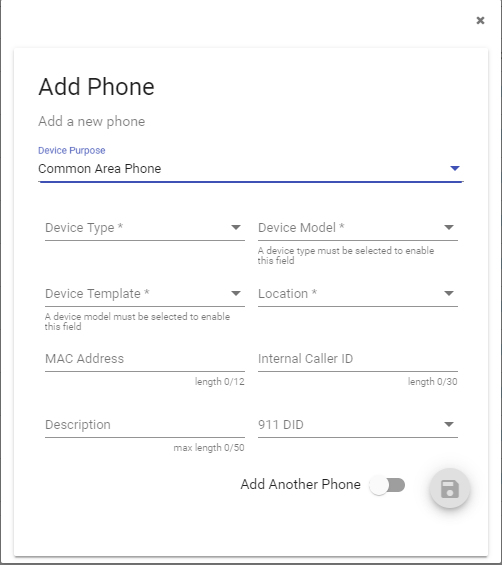
3. Select Common Area Phone under "Device Purpose" depending on the intended use of the phone.
3. Fill in the fields below.
Device Type:
Device Model:
Device Template:
Location:
MAC Address:
Internal Caller ID:
Description:
911 DID:

4. Save 
Method 2: Changing an existing available phone to Common Area.
1. Go to the Phones tab and select an available phone.
(Note: The "Description" column will identify whether or not a phone is available.)

2. Highlight the phone and click "Change to Common Area Phone" from the hamburger menu.

3. Fill out the "Change to Common Area Phone" template and click "Save".

What is a Common Area Phone?
A Common Area Phone is a phone created without a specific user in mind. These phones will typically be in the lobby, hallway, break room, or any other "common area" where a phone may be required but a designated user will not be available.
Please note that a common area phone is not going to be able to receive voicemail.
