Cisco Connect Admin - Add Phone To User
Cisco – How to Add a Phone to a User / Non-User
Summary:
There are two ways to add a phone to a user as well as many types of phones to choose from. You can add an existing available phone or create a new one from scratch.
Device Purpose:
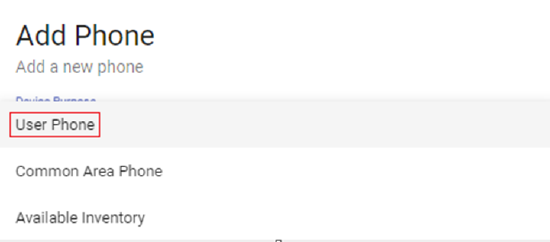
User Phone: This phone will be attached to an existing user with a DID and have voicemail capabilities. This is typically the most common type of phone created
Common Area Phone: This phone does not need a user but just a DID. This does not have voicemail capabilities and is typically used for either a conference phone or one to be in use in a common area
Available Inventory: This phone will have its configurations set up (MAC, Location, etc.) but won’t be attached to a DID or user. This option is usually used to build inventory and then to add the phone to the user or changed to a Common Area Phone when ready
Device Types:
Cisco Phone: This phone is the most common type and is used when phones are plugged behind an ASA to register
Edge Phone: This phone will act as a normal phone but won’t be plugged behind an ASA on the network. These would be logged in via Connect credentials and a service domain. For more information on Edge Phones, please visit this article: Cisco – Edge Phone Configuration
Cisco Remote Phone – VPN Enabled: This phone will act as a user phone but only need to be plugged behind an ASA to grab VPN credentials. After it’s registered, it can be taken to any location remotely and still register and function normally
Jabber Soft Phone: This is a soft phone that uses the Connect login credentials to use. They still need a DID assigned to it and can be used for Desktops, Apple, Android, and Tablet devices
Cisco ATA: This is used for ATA 190s and 191s for faxing or used for analog phones. This needs an ASA to function properly. For more information on ATAs, please visit this article: ATA – Configure ATA 190 and 191
Third-Party Sip Device: This device type is usually reserved for devices that CallTower does not manage. We can attempt to get the device to register with the CUCM but we cannot guarantee functionality
Creating A User Phone From Scratch:
You must be an MPOC (main point of contact) on the account to create phones. Navigate the following in Connect: Menu/Phones
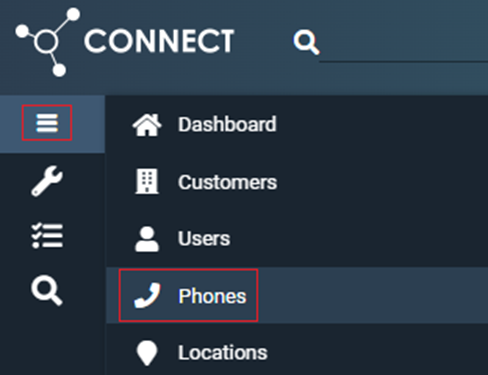
Here you will see all phones on the account. Select the “+” button on the right-hand side to get started.

The below screen will pop up with a drop-down. You will select the “User Phone”.
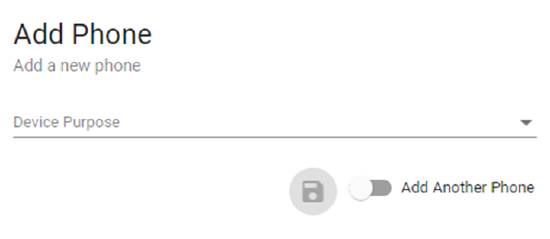
The below screen will show and you will select “Device Type”. A drop-down will populate with the different device types to choose from. Select “Cisco Phone.”
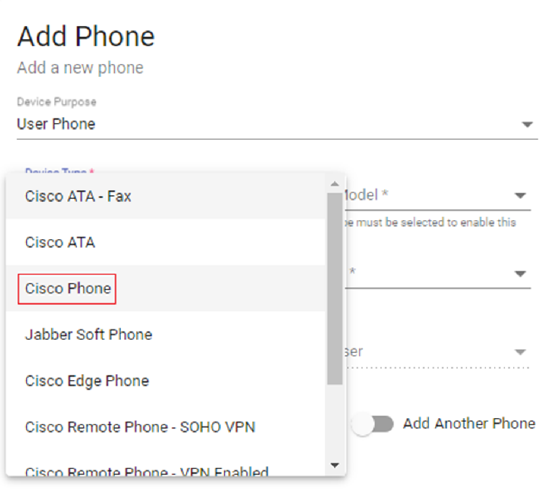
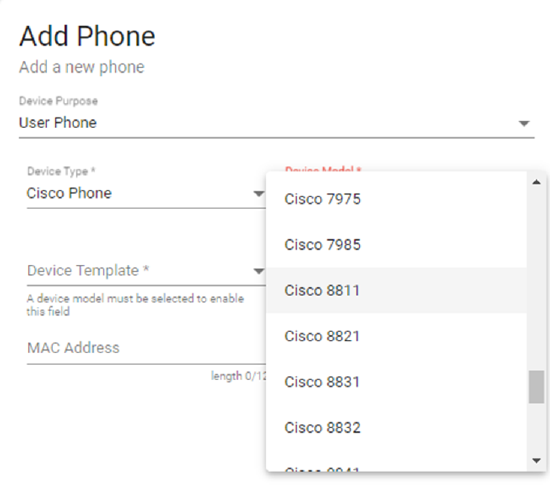
Afterward, you may select “Device Model” and click on the model of the phone from the drop-down.
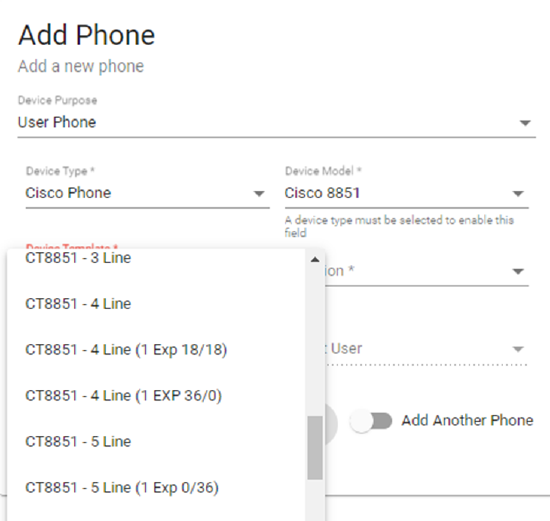
Click on “Device Template” now and a drop-down will pop up to show you the options to choose from. This is for how many lines you would like the user to have on the phone. For example, Line 1 would be the user’s main line and Line 2 can be another extension on the account. When someone would call that Line 2 extension, the user on Line 1 would also get that call on their phone. You can ignore the “(1 EXP X/X)” selections as those are reserved for phones with sidecars. Only select those types if the phone has a physical side car plugged into the phone itself.
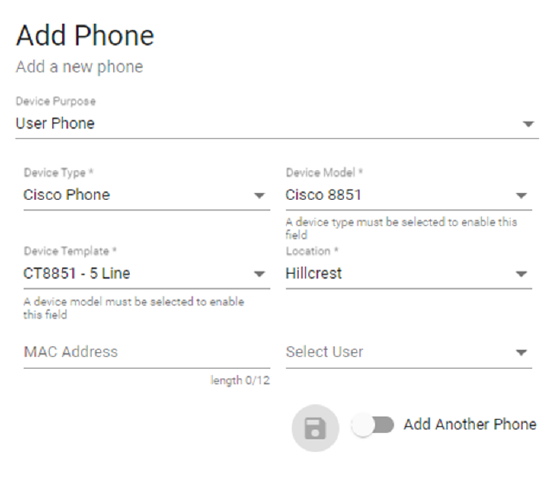
After selecting how many lines (you can always change the amount later) you’d like to have for the user, you can choose “Location” and click on the location the user is built on.
From there, you add the MAC Address of the phone in the “MAC Address” box. It should be a 12-character alphanumeric. You can locate this MAC address under the phone near a barcode labeled MAC. You can also search this on the phone itself under “Phone Information” by navigating the Settings menu.
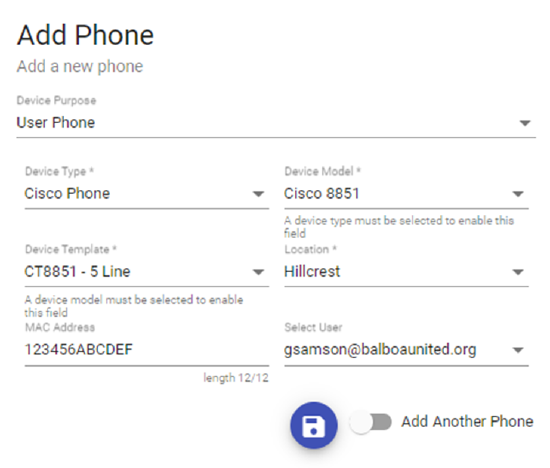
Finally, you will add the user by clicking the drop-down “Select User” and clicking on the user’s email that was created in Connect.
If the user already has a phone, this “911 DID” box will populate. Click on the drop-down and select any available DID. This will serve as a placeholder. The same original extension will be assigned to the user and the calling masking will be set to the original DID.
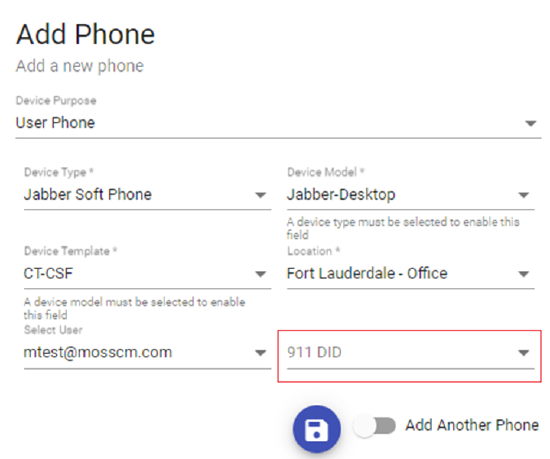
Click the blue floppy disk to save and the process should start. Once the “Events” on the bottom left shows all numbers in the green box, this User Phone has been successfully created. The phone should register shortly after. Make sure the cabling is good/secure and the phone is plugged behind an ASA.
Creating A Common Area Phone From Scratch:
You must be an MPOC (main point of contact) on the account to create phones. Navigate the following in Connect: Menu/Phones
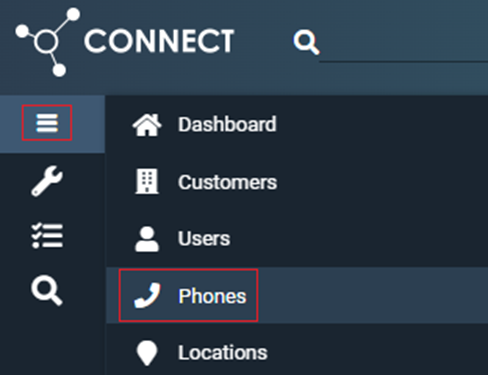
Here you will see all phones on the account. Select the “+” button on the right-hand side to get started.

The below screen will pop up with a drop-down. You will select the “Common Area Phone”.
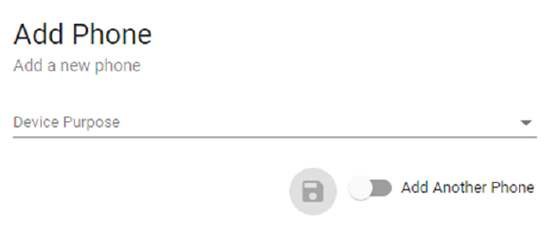
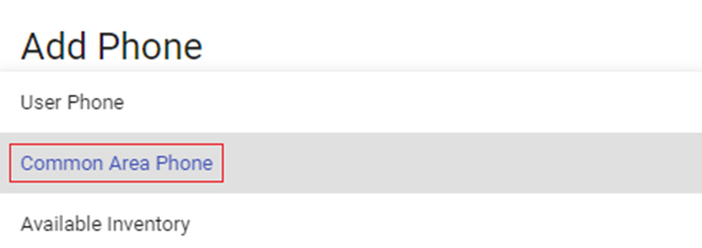
The below screen will show and you will select “Device Type”. A drop-down will populate with the different device types to choose from. Select “Common Area Phone.” for phones plugged behind an ASA device.
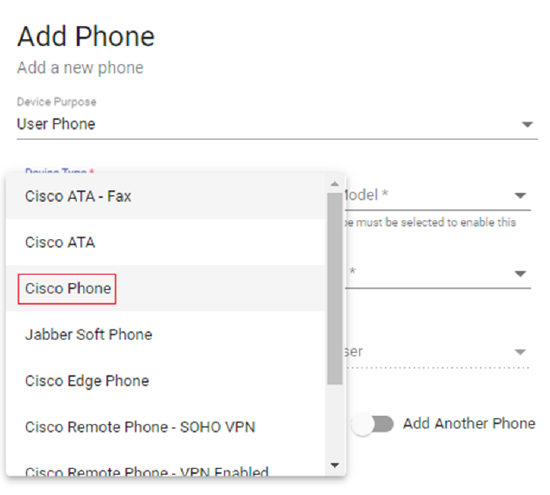
Afterward, you may select “Device Model” and click on the model of the phone from the drop-down.
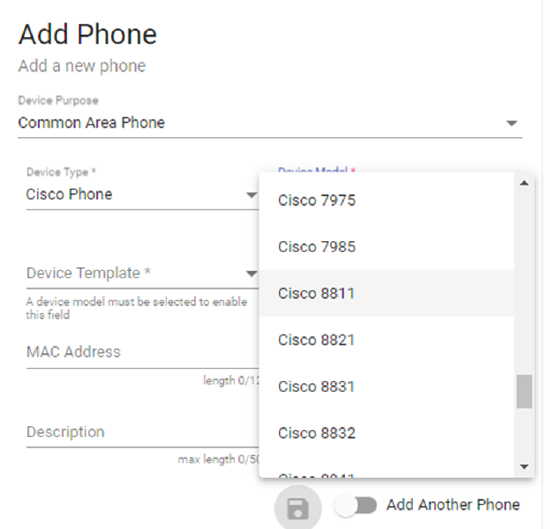
Click on “Device Template” now and a drop-down will pop up to show you the options to choose from. This is for how many lines you would like the user to have on the phone. For example, Line 1 would be the user’s main line and Line 2 can be another extension on the account. When someone would call that Line 2 extension, the user on Line 1 would also get that call on their phone. You can ignore the “(1 EXP X/X)” selections as those are reserved for phones with sidecars. Only select those types if the phone has a physical side car plugged into the phone itself.
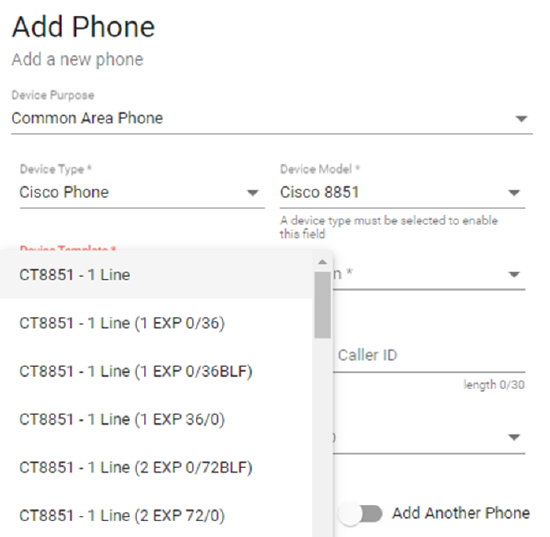
After selecting how many lines (you can always change the amount later) you’d like to have for the user, you can select “Location” and click on the location the user is built on.
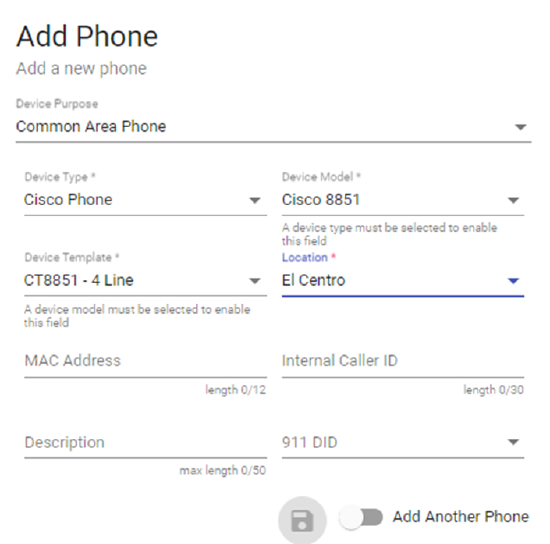
From there, you add the MAC Address of the phone in the “MAC Address” box. It should be a 12-character alphanumeric. You can locate this MAC address under the phone near a barcode labeled MAC. You can also search this on the phone itself under “Phone Information” by navigating the Settings menu.
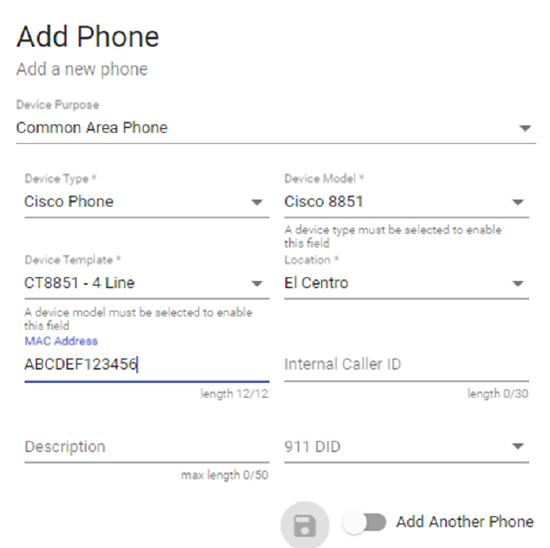
From there, you will fill out the two boxes labeled “Internal Caller ID” and “Description”. This will be the name of the phone.
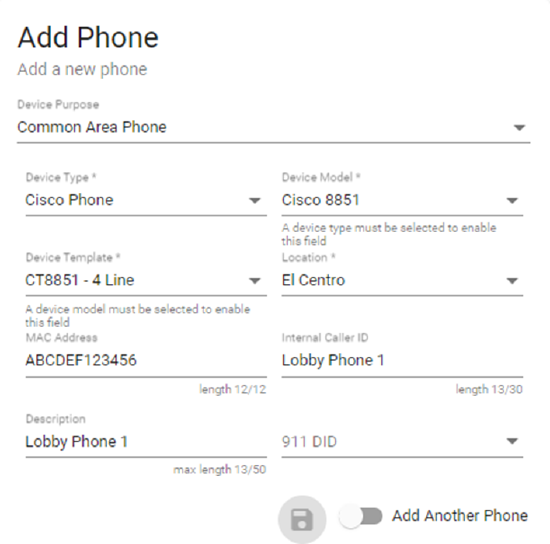
Finally, you can click on the drop-down labeled “911 DID”. This will show a list of DIDs on that location of the account that is available.
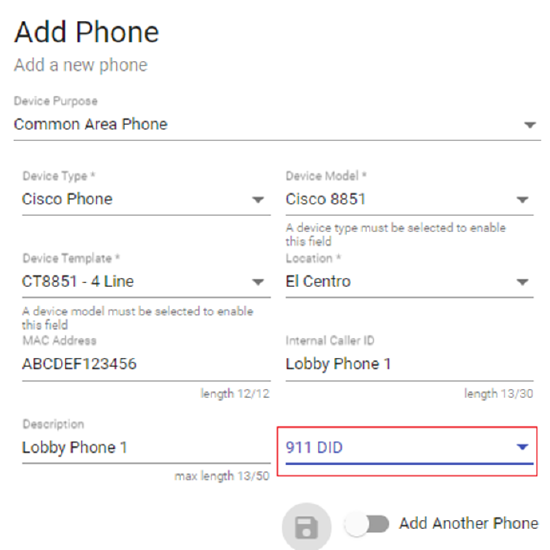
Click the blue floppy disk to save and the process should start. Once the “Events” on the bottom left show all numbers in the green box, this Common Area Phone has been successfully created. The phone should register shortly after. Make sure the cabling is good/secure and the phone is plugged behind an ASA.
Creating a Jabber User Phone from Scratch:
You must be an MPOC (main point of contact) on the account to create phones. Navigate the following in Connect: Menu/Phones
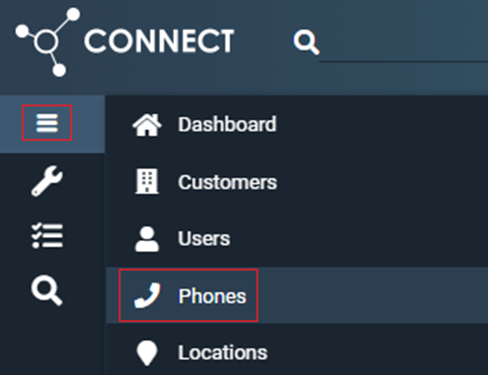
Here you will see all phones on the account. Select the “+” button on the right-hand side to get started.

The below screen will pop up with a drop-down. You will select the “User Phone”.
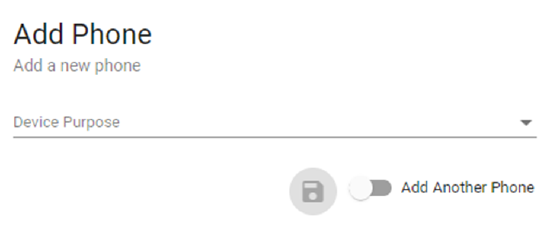
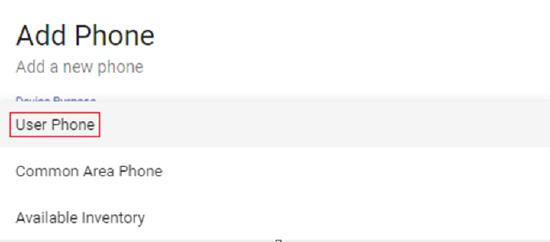
The below screen will show and you will select “Device Type”. A drop-down will populate with the different device types to choose from. Select “Jabber Soft Phone.”
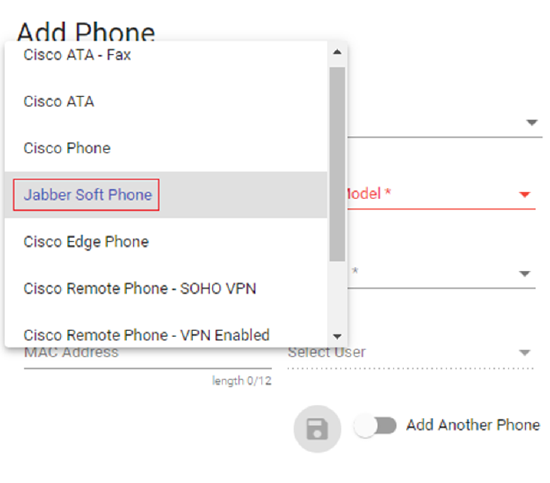
Afterward, you may select “Device Model” and click on which application the softphone will be used for from the drop-down.
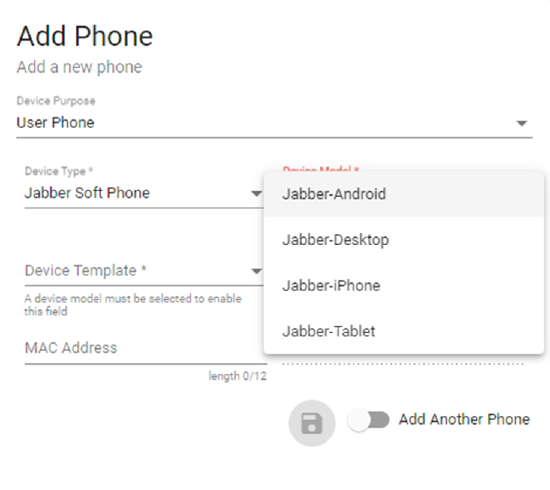
Click on “Device Template” now and a drop-down will pop up to show you the options to choose from. This is for how many lines you would like the user to have on the phone. For example, Line 1 would be the user’s main line and Line 2 can be another extension on the account. When someone would call that Line 2 extension, the user on Line 1 would also get that call on their phone. Most Jabber users will have only 1 line available. Some HCS users may have up to 2.
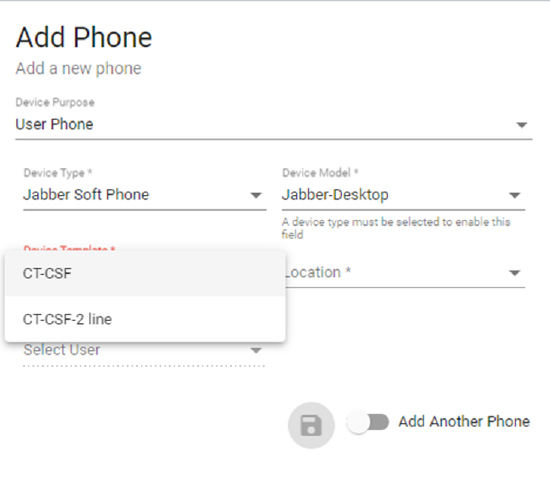
After selecting how many lines (you can always change the amount later) you’d like to have for the user, you can select “Location” and click on the location the user is built on.
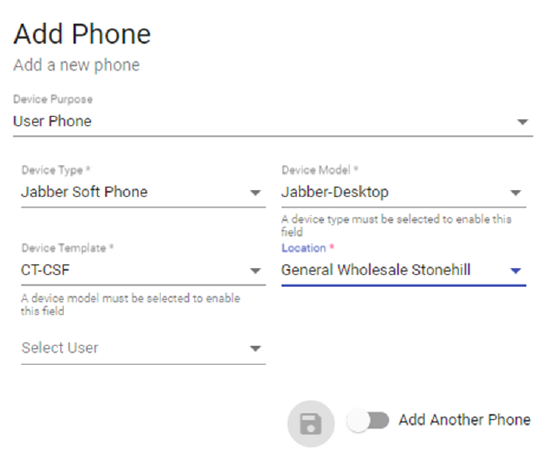
Finally, you will add the user by clicking the drop-down “Select User” and clicking on the user’s email that was created in Connect. The user can now download the application and log in via Connect username and password.
Click the blue floppy disk to save and the process should start. Once the “Events” on the bottom left shows all numbers in the green box, this Jabber User Phone has been successfully created.
How to Add an Available Phone to a User
Navigate the following in Connect: Menu/Users
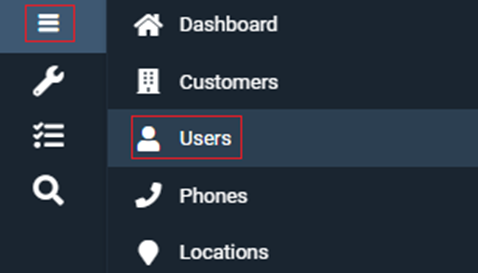
Search for the user in the “Global Filter” by first name, last name, DID, or extension.

Expand the user and click on Phones/Phones

Click on the “+” button to add a phone

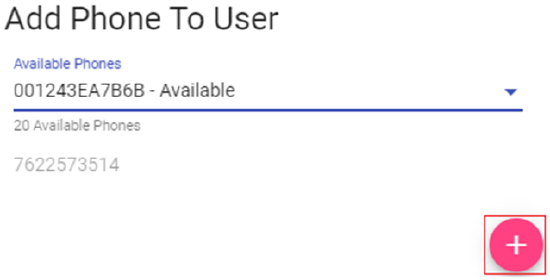
Select the drop-down and click on the MAC address of the phone you’d like to add to the user
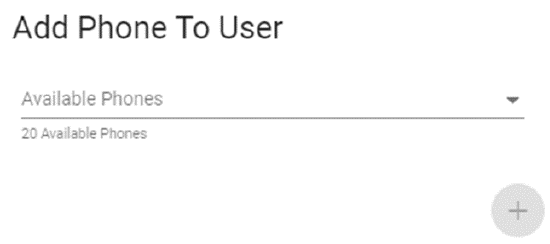
After, click the pink “+” button to save your selection
If the user already has a phone attached to them, you see a drop-down for “911 DID” show up. Click on it and select any available DID. This will act as a placeholder. The user’s original DID will call both phones and the calling mask will automatically be set for the user’s original DID as well.
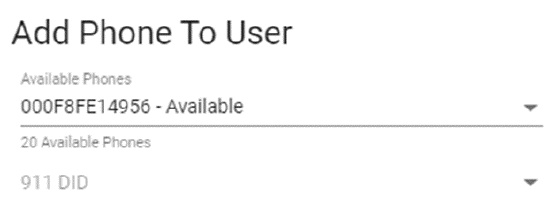
Hit the pink “+” button and that will save your selection.
