Cisco CallTower Connect Phones - Third Party SIP Devices
Goal
This article will give the step by step instructions on how to add a Third Party SIP Device to CallTower Connect.
Case Disposition - Third-Party SIP Devices
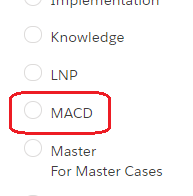
If you are adding a device it then will be a Support Standard - MACD.
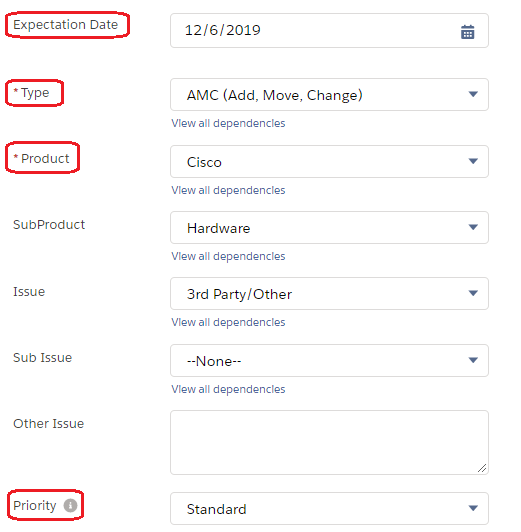
Required Fields:
Expectation Date - The date the request needs to be completed. This should go off of the customer's needs or the SLA of the request.
Type - AMC (Add, Move, Change)
Product - Cisco
Not Required Fields:
SubProduct - This is not required
Issue - This is not required
Sub Issue - This is not required
Priority - Standard if it does not need to be done immediately. Otherwise, it's Expedited.
Resolution/Steps
1. Sign in to CT: Connect at https://connect.calltower.com/connect/
2. Select the "Hamburger" Menu at the top which will have a drop-down where you will select "Phones"
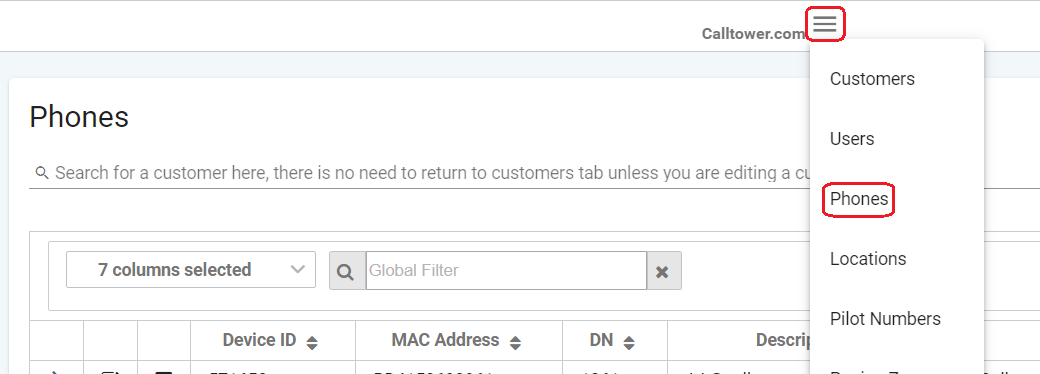
Or click on the phone icon to pull up the phones.
![]()
2. Click on the Add Button to add a new device

3. You then will select the "Device Purpose"
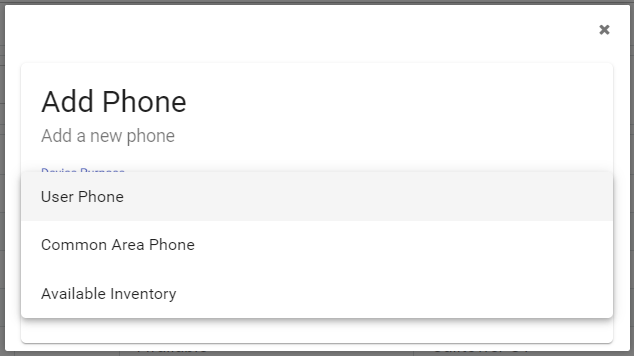
Device Purpose Definitions:
User Phone - A phone that is going to be assigned to a specific user with a Voicemail box.
Common Area Phone - A phone that is not going to be assigned a user or Voicemail. This is used to make and take calls like a hallway phone.
Available Inventory - Phone that will be added to CallTower Connect to be used for a later time.
4. Add Phone
Device Type - Third-Party SIP Device
Device Model - Basic Third-Party SIP Device
Device Template - CT Third-Party SIP Device
MAC Address - put in the 12 character MAC Address of the device.
Location - Select the location of the device.
911 DID - Select the DID from the drop-down that will be assigned to this device.
***If the device is a common area phone, proceed to step 4.
***If the device is a user phone, proceed to step 4a.
***If the device is available inventory, click next and proceed to step 5.
4a. If the device is a Common Area Phone
Device Type - Third-Party SIP Device
Device Model - Basic Third-Party SIP Device
Device Template - CT Third-Party SIP Device
MAC Address - put in the 12 character MAC Address of the device.
Location - Select the location of the device.
911 DID - Select the DID from the drop-down that will be assigned to this device.
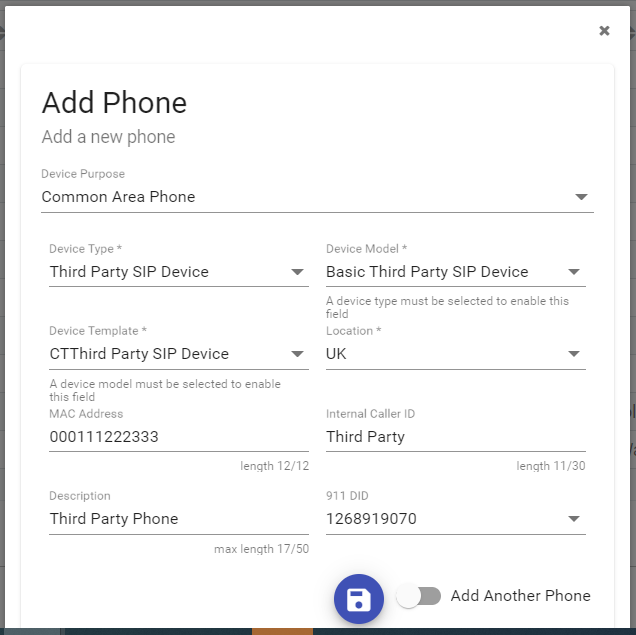
The description is what will appear on the phone display screen.
The internal caller ID is what will display on the caller ID when calling other phones.
Once Completed select the save button: 
4b. If the device is a User Phone
Device Type - Third-Party SIP Device
Device Model - Basic Third-Party SIP Device
Device Template - CT Third-Party SIP Device
MAC Address - put in the 12 character MAC Address of the device.
Location - Select the location of the device.
911 DID - Select the DID from the drop-down that will be assigned to this device.
Select User - Select the User that will be assigned this device.

Additional Information:
Check which cluster the user is on.
The device will have to point to that cluster.
If the device is a VPN device, the user must configure the device to be VPN as CallTower does not offer support for third party devices.
**Some devices do need a username and password to be able to connect. In most cases, this username will be the "Digest User" which can be found in CUCM and our default password is 12345
**The device must also be built in CT: Connect in the phones section.
**Revolabs FLX 2 Analog Conference Phone requires a username which is the digest user in Call Manager (CM)
**Please advise the caller that Call Tower does not offer support for Third-Party Devices and they will have to troubleshoot the device to ensure they are able to make phone calls with it.
If the client has a question about which phones we offer support for, this information can be found in the Cisco Phone Support Policy.