CT Cloud Contact Center - Agent Dashboard User Guide
Accessing the Agent Dashboard
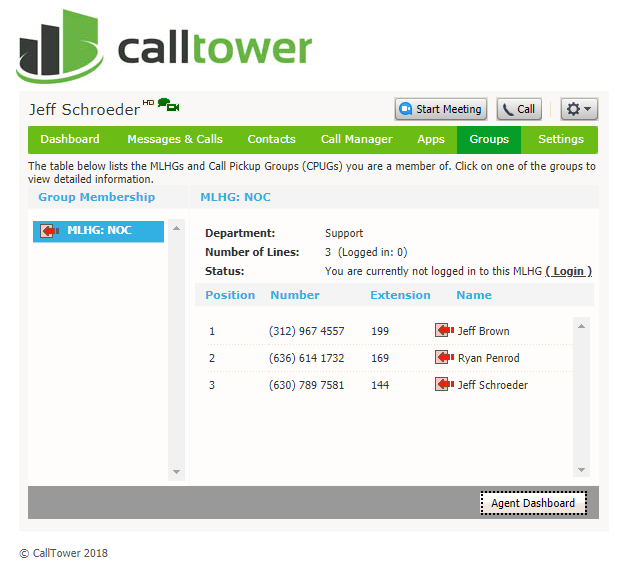
Log in to Commportal at https://commportal.calltower.com. Select the Groups tab. From the Groups tab, you can see the groups (queues) you belong to. Click on the name of the group / queue in the Group Membership panel to display the group’s details, including:
- How many users are members of the queue
- Current login status of each queue agent
- Details of each user in the queue
The Agent Dashboard is also available from the Groups tab. Click on the Agent Dashboard button to open.
Logging in and out of queues
Agent status is shown with the following icons:
 Agent is logged in
 Agent is logged out
You can change your login status by:
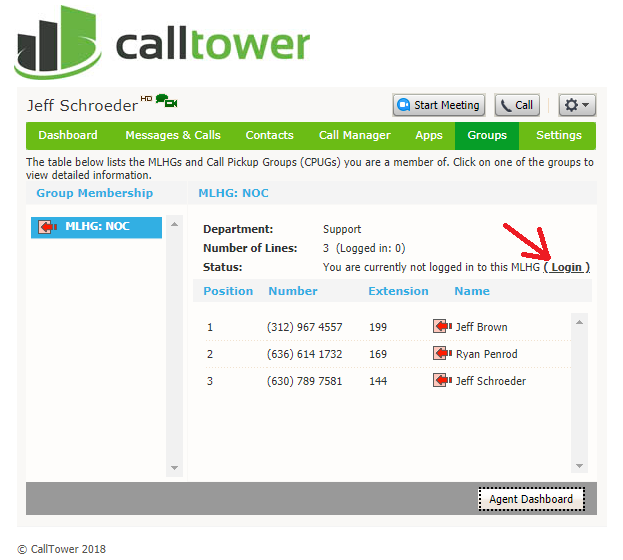
Using the Groups tab
Login/Logout by simply clicking on the hyperlink in the Status display
Using the Agent Dashboard
Click on the Agent Dashboard button to open. Click on the Login / Logout icon for each queue to toggle Logging in and out.
Agent Status
You can use the Current State drop down menu in the top right hand corner of the Agent Dashboard page to show whether or not you are currently available to take queue calls. By default, the two states in the menu are Available and Not Ready. The Available state indicates that you are available to handle calls. If you need to stop receiving calls (for example you are taking your lunch-break or you are going to attend a meeting), use the Current State drop down menu to switch to the Not Ready state or another state that is most appropriate for the reason that you cannot currently handle calls. When you switch out of the Available state, you will not receive calls via any of your Queues. Once you are available to take calls again, you must switch back into the Available state before you can receive any calls. Your supervisor is responsible for adding additional not ready states, such as Training, Meeting, At Lunch, etc.
Incoming Calls
When an incoming call is received, the Incoming Call panel displays any available caller information. When a call has been received via a Queue, the pop-up Agent Panel displays the following information about the Queue that the caller dialed:
- Name of the Queue that was originally called
- Avg. waiting time for a call to be answered in that
- Queue
- Calls in Queue
- Number of agents logged into the Queue
- Whether you are logged in to this Queue.
This information will help you answer the call appropriately. (Ex. you will be able to see when a caller has been waiting a long time for a response.) If the call did not arrive via a Queue, you will see a message saying ‘No matching queue’. If an incoming call stops ringing for any reason (for example, it was answered by another agent or the caller hung up), the incoming call details will fade out over a few seconds. The Incoming Call panel will display the message ‘No incoming call’ if there are currently no incoming calls in any of the Queues that you belong to.
Wrap Up and Disposition Codes
Your Call Center supervisor may configure a Wrap Up timer and / or Disposition Codes to classify queue calls after hanging up. Please contact your supervisor for information on when to use particular Disposition Codes or to have codes added or changed.
If Wrap up is enabled, you will see a pop up and will be put into the Wrap-up state after each queue call is completed. While you are in the Wrap-up state, you will not receive calls via any of your Queues, allowing you time to carry out any work related to the completed call. The Wrap Up state may be timed, after which you will be placed into the Available state to receive additional calls. If not timed, you will need to manually change your state to Available in order to receive queue calls again. This option is controlled by your Call Center supervisor.
If Disposition Codes are enabled, you will see a pop up when you try to go back to the Available state. Select the appropriate Queue from the first dropdown, then the appropriate Disposition Code from the second drop down menu. If this menu is labeled Select a Disposition Code, you will not be able to continue until you have chosen a code. If this menu is labeled Select a Disposition Code (optional), you can choose whether or not to choose a codeClick OK when complete.
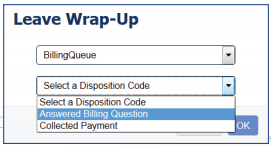
NOTE: DISPOSITION CODES REQUIRE WRAP UP BE ENABLED.