CT Cloud Fax - Legacy Interfax
There are 2 applications utilized for CTFax Complete: End User’s Email Application and User Portal.
Sending Faxes Via email
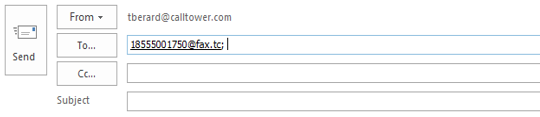
To send an eFax using email, just type into the “To” field:
-
1(10 digit phone number you want to fax to)@fax.tc.
Example: 18555001750@fax.tc
Note: You will need to add authorized users under Preferences >> Outgoing in the user portal.
Once added the user@domain user will be able to send outbound faxes from their email address.

User Portal Settings
- To login to the User Portal:
- Visit: https://secure.ctfaxcomplete.com.
- Enter your username and password.
- Username: Your CTFax Complete number
- Password: Calltower1
- Example:
.png?revision=1)
- To change your password:
- Click on “PREFERENCES”
- Click on “Change” under “General”
- Once the new screen appears, enter your “Old”, ”New”, “Confirm”, then “Save new password”.
- To send an eFax:
- Click on “SEND FAX”
- Enter the 10 digit fax number you want to send to in the “FaxNumber” field and click “Add”. This will load the number into the “Recipients” box.
- Hint: You may add multiple numbers
- There are 2 options to send an eFax; Attachment or Message. You may choose one or the other, but not both.
- Attachment: Click “Upload a file to be faxed” and choose a local file.
- Message: Click the check box “Add the following text as a first page”, then type you message.
- Click “Submit”:
.png?revision=1)
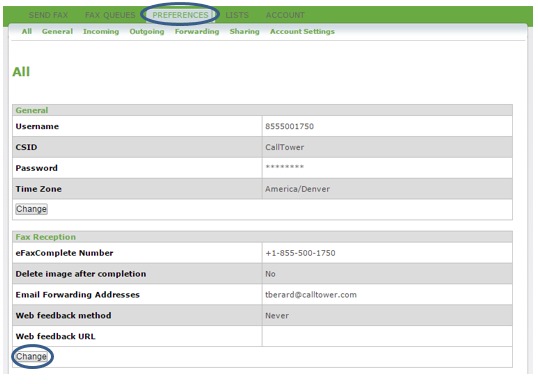
- To add additional incoming eFax Complete recipients:
- Click on “PREFERENCES”
- Click on “Change” under “Fax Reception”
.png?revision=1)
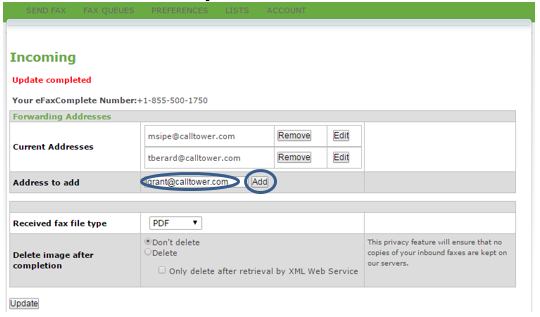
- Enter the desired email address in the “Address to add” field, then click “Add”
- Hint: No need to click “Update”
.png?revision=1)
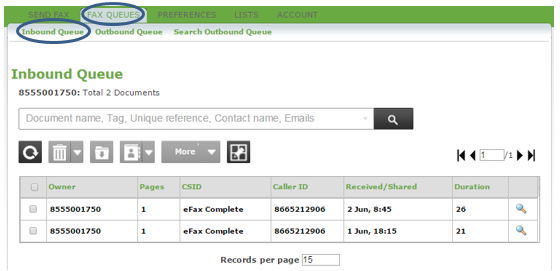
- To view emails you’ve sent:
- Click on “FAX QUEUES”
- Click on “Outbound Queue”
.png?revision=1)
- To view emails you’ve sent:
- Click on “FAX QUEUES”
- Click on “Outbound Queue
.png?revision=1)