Polycom Phones: How To Add VVXs To The Provisioning Server
Environment
Skype For Business
Phones VVX 300, 310, 400, 410, 500, 600
Office 365 Integration
All Troubleshooting steps / How To:
o Notes: Follow these steps when trying to add a Polycom VVX phone to the provisioning server.
Navigate to the phones menu page by pressing the "home" button on the right hand side of the
phone's screen, On the phone go to:
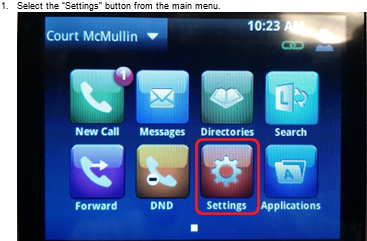
o 1. Select the "settings" button from the main menu.
Example:
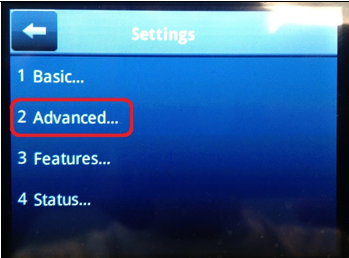
o 2. Select the "advanced" option from the setting menu (normally option 2).
Example:
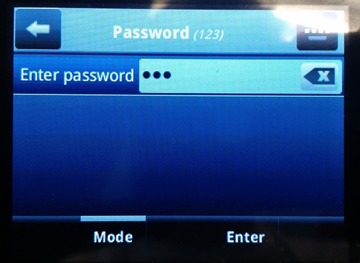
o 3. After selecting the option for advanced settings it will prompt you to enter a password. The default password is “456”. If that password does not work, it’s worth trying “654” as the password. (If the password 654 works then chances are the phone is already on the provision server since this is a setting we push out to phones on the server). If the password is unknown, then a factory reset will be necessary.
Example:
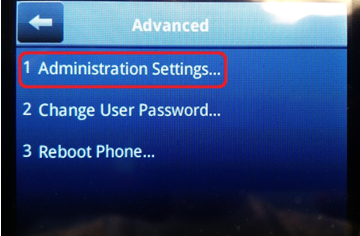
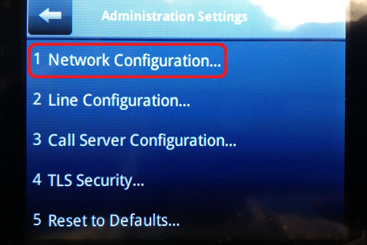
o 4. From the advanced settings menu, select the option for “Administration Settings” (normally option 1).
Example:
o 5. In the administration settings, select the option for “Network Configuration…”
Example:
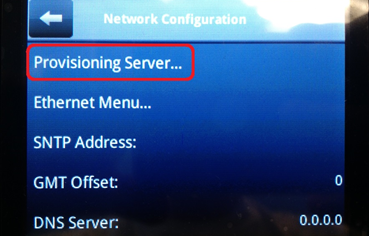
o 6. Select the option for “Provisioning Server…” from the administration settings.
Example:
o 7. If the provisioning server hasn’t been set up yet, then the field for “Server Address:” will be blank. To add the phone to the server, select the option for “Server Type:” and choose “HTTP”. Then in the field for “Server Address:” input “pps.calltower.com”. The rest of the settings can be left as they are and do not need to match the image below.
Example:
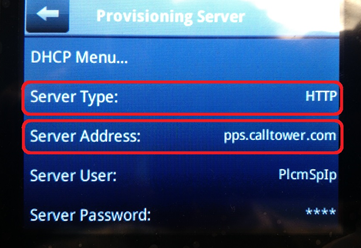
o Note: if the phone is already on the provisioning server, the “Server Type:” will read “FTP” instead of “HTTP”. Do not change this setting. The server type automatically changes once connected to the provisioning server.