Installing the Upgraded CT Unite CXI application.
Summary:
This guide will walk you through the steps to upgrade to the latest version of CT Unite CXI.
Step-by-Step Instructions:
Step 1:
Download/Obtain CT Unite CXI 4.11 or later. (Link to Download)
Step 2:
Run Installer and agree to Terms.

Step 3:
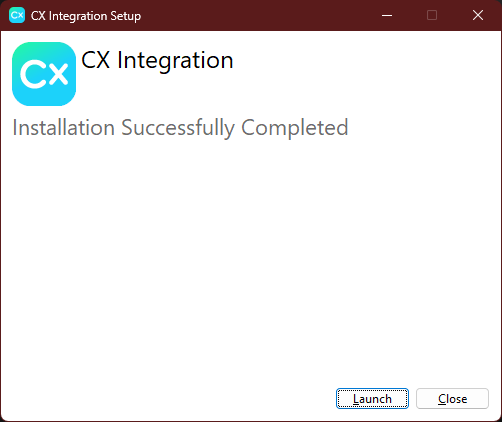
Wait while the Installer Completes.

Step 4:
Once the Installer says it has completed then click the "Launch" Button.
Step 5:
Be Patent while the CT Unite CXI client loads, then you will be presented with a login screen.

Step 6:
Click "Advanced" and verify that the Access Code is set to MCTWR

Step 7:
Click on "Login In" to log into the client. If you are presented with a screen to grant the app permissions, go ahead and grant it permissions.
<ScreenShot Needed>
Step 8:
Once you are signed in you sill see a new icon in your event taskbar.

Step 9:
Right Click on the Icon to get to the configuration button.
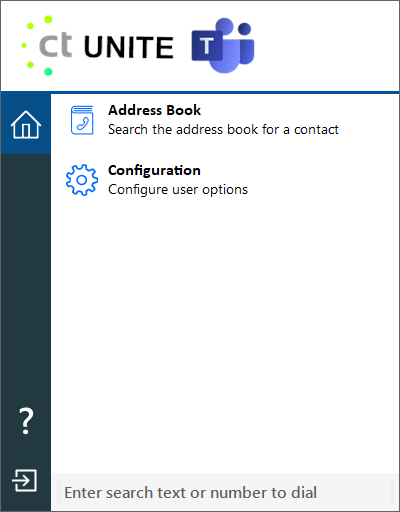
Step 10:
Click on the Configuration Button.

Step 11:
You will be presented with a configuration screen where you can now customize the CT Unite application. If the Update was successful you should see your Integration listed under integrations. If not go ahead and click (Add New) and reconfigure your integration.

Step 12:
You should now be Migrated to the new version. See Here for additional Guidance on configuration of Integrations. (Link)