Cisco Unity - Voicemail to Email
Unity
NOTE: TO REMOVE FORWARDING, FOLLOW STEPS 6-8 AND CHANGE THE FORWARDING ADDRESS TO NONE.
- RDP to the Unity server and open Active Directory Users and Computers.
- Look for an folder called VM to Email or something similar. If you don't see one, right click on the domain itself, and select New Organization Unit. Create a new OU called VM to Email and proceed to Step 3.
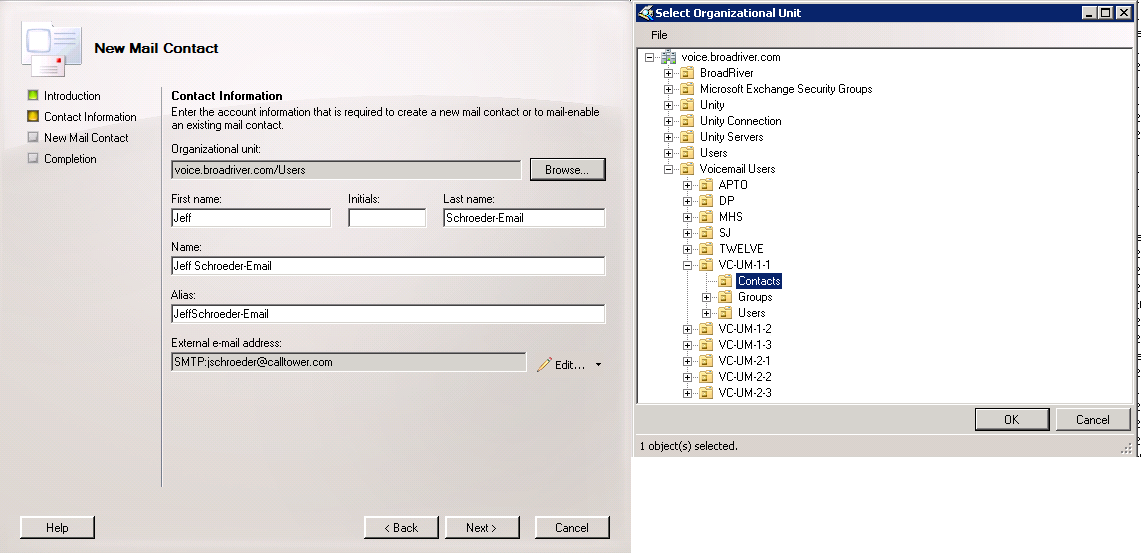
- Create an Exchange contact by right clicking on the VM to Email OU and selecting New, Contact. Enter the user's first name, then the user's last name with the suffix '-Email' at the end. Click Next to continue.
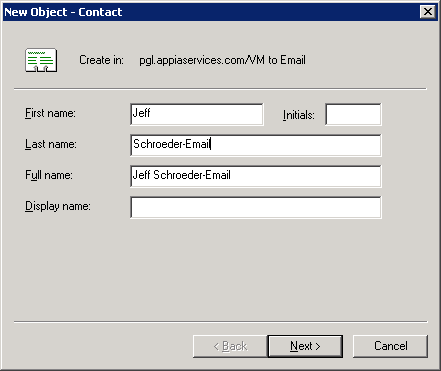
- Click on the Modify button next to the Email field, then select SMTP address. Enter the user's email address and click OK.
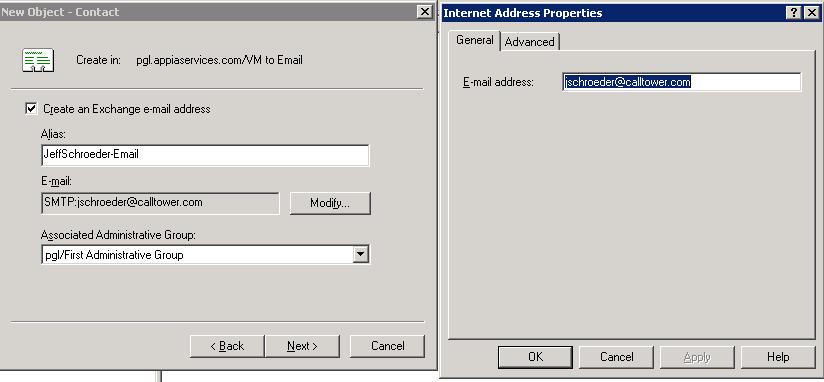
- Click Next, then Finish to create the Exchange contact.
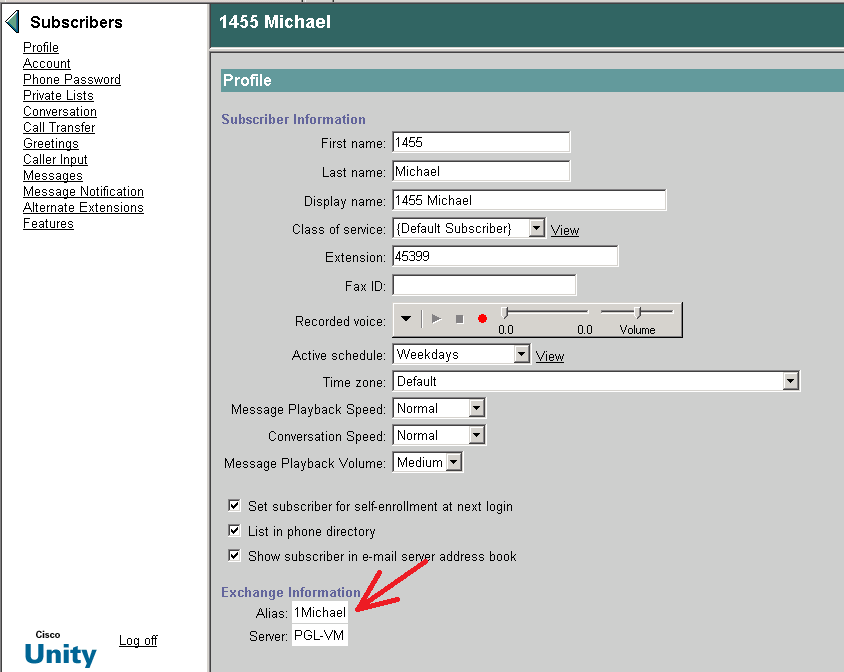
- Locate the user's account in Active Directory. Use the Alias field (shown by the red arrow below) to match the Active Directory user name with the Unity Subscriber account if necessary.
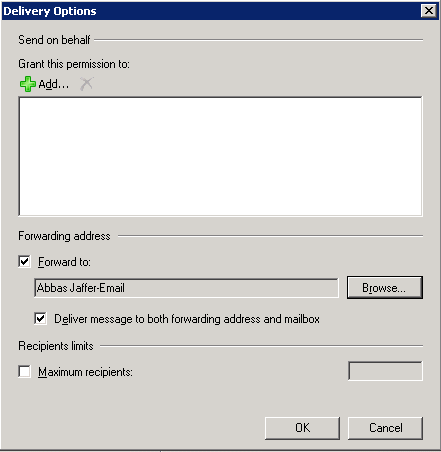
- Navigate to the Exchange General tab on the user's Active Directory account. Click on the Delivery Options button, then the Forward To radio button. Click on the Modify button under Forwarding Address to select a forwarding destination. Search for the contact created above, then click OK.
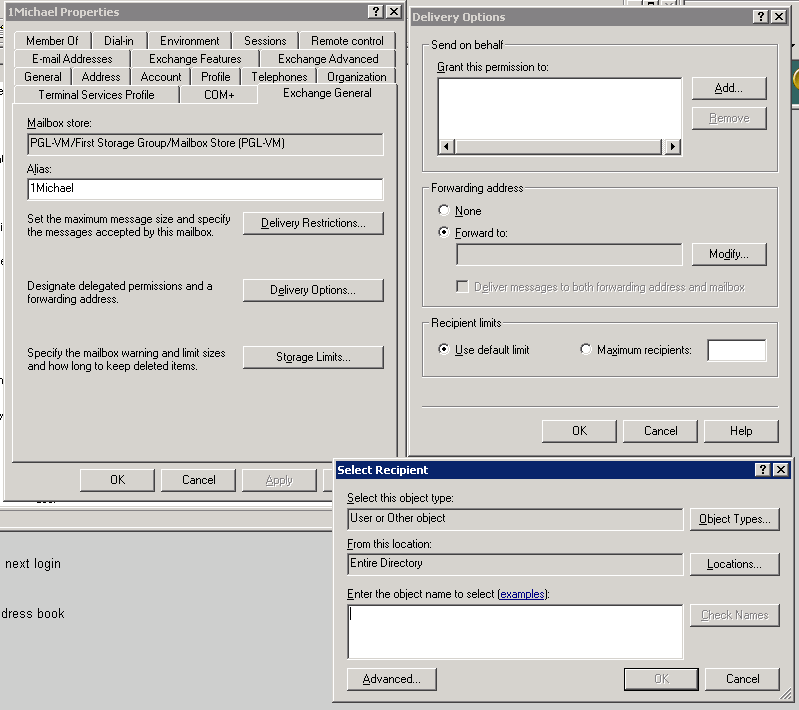
- For messages to show up on both the user's phone and in email, check the Deliver Messages to Both Forwarding Address and Mailbox option. For messages to show up in email only, leave this option unchecked. Click OK to apply changes.
Atlanta Unity
NOTE: TO REMOVE FORWARDING, FOLLOW STEPS 4 and 5 AND CHANGE THE FORWARDING ADDRESS TO NONE.
- RDP to the shared Exchange server 208.52.155.15. Open Exchange Management Console. Right click on Mail Contact under Recipient Configuration and select New Mail Contact.
- Under Contact information, enter the user's first name, then last name with the suffix '-Email.' Click on the Browse button next to the Organizational Unit field and select the Contacts OU for the correct Unity server under Voicemail Users.
- Click Next, then New to create the new contact.
- Locate the user's mailbox in Exchange Managment Console. You can right click on Mailbox and select Find to help locate the correct user. Go to the Properties of that user and select the Mail Flow Settings tab.
- Highlight Delivery Options and click on the Properties button. Click on the Forward To checkbox, then the Browse button to select a forwarding destination. Search for the contact created above, then click OK.
Unity Connection
- Navigate to the Unity Connection web interface and select Users.
- Search for the user as necessary, then click on the user's alias to edit that user.
- Click on the Edit dropdown and select Message Actions. Select the correct option for Voicemail from the dropdown menu. The options are:
- Accept the Message - This is normal voicemail.
- Relay the Message - Send the message as an email, do not show the message on the user's phone.
- Accept and Relay the Message - Send the message as an email, and show the message on the user's phone.
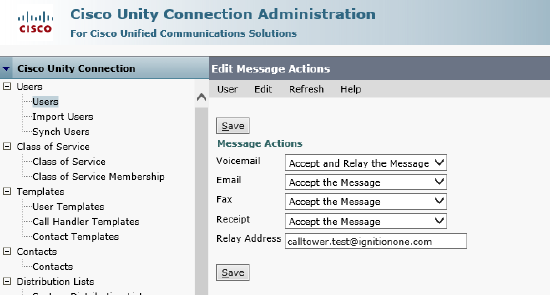
- Click Save to update the user.