Skype For Business: How To Block Telephone Numbers From Leaving VMs(Voice Mails) On Desktop Client
All Troubleshooting steps / How To:
o Notes: Follow these step by step instructions to prevent VM calls from ringing through to your Skype client or phone, This is a
part 2 to KB: 000001674 - Skype For Business: How To Block Telephone Numbers On Desktop Client.
To prevent callers from being able to leave you a voicemail:
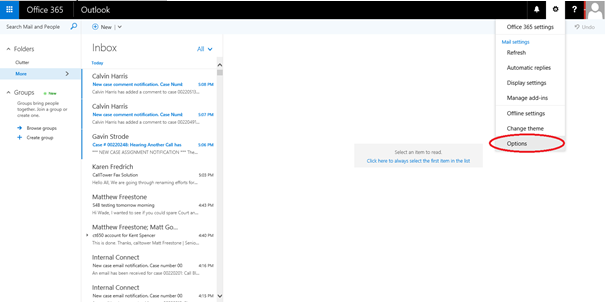
o 1. Open a web browser and login to your mailbox via OWA (for Office365 customers the link ishttps://login.microsoftonline.com)o 2. In the top right corner of the Office365 portal you will see a settings cog. Click this cog and from the drop down menu select the “Options” button.
Example:
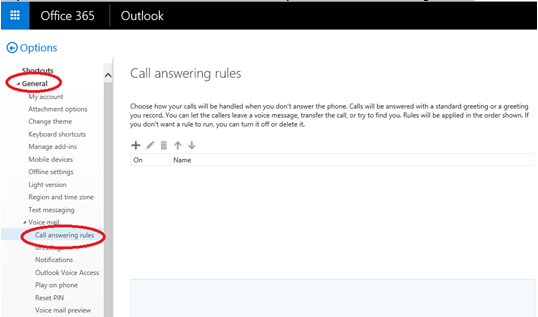
o 3. On the left hand side you will see a menu with options. You will need to expand the “General” section to find the voice mail options.
o 4. Expand the “Voice mail” section and select the option for “Call answering rules”
Example:
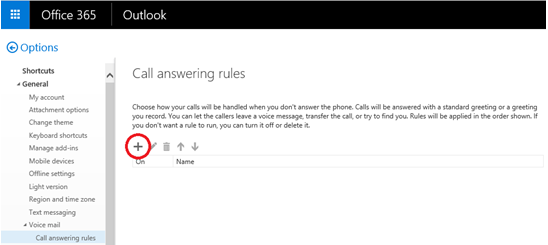
o 5. Click on the “+” symbol to add a new rule.
Example:
o 6. Create a name for the rule.
Example:
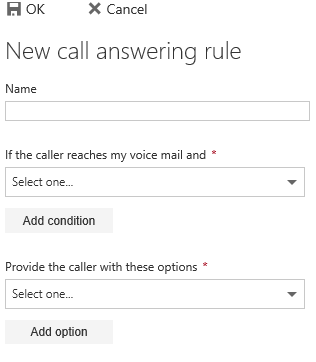
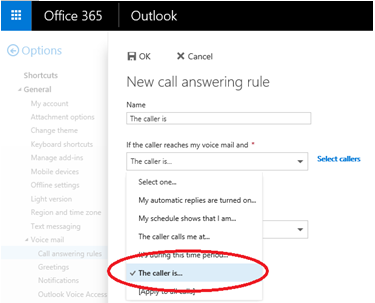
o 7. From the first drop down menu (“If the caller reaches my voice mail and *”) you will need to select the option “The caller is…”.
Example:
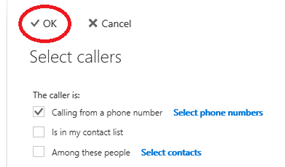
o 8. Check the box for “Calling from a phone number” and then choose the “Select phone numbers” link.
Example:

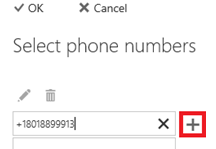
o 9. In the top field enter in the number you would like to prevent from being able to leave a voice mail and click the “+” symbol on the right hand side and click “OK” to save. (Note: you many enter as many numbers as you would like before clicking OK)
Example:
o 10. Click “OK” from the select callers page
Example:
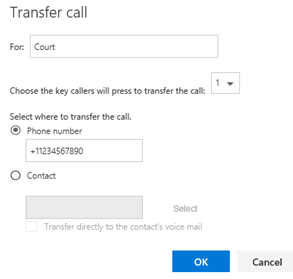
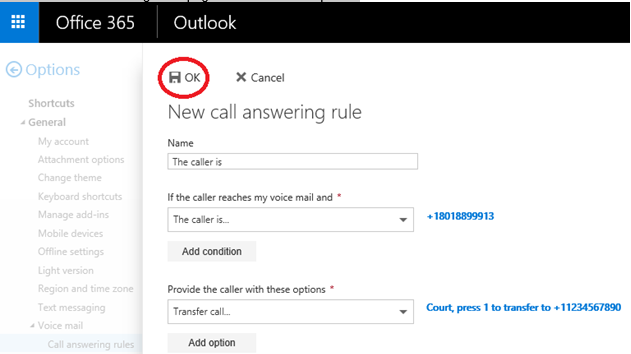
o 11. From the second drop down menu (Provide the caller with these options*) select the option for “Transfer call…” and a new window will appear
Example:

o 12. In the first field labeled “For:” You may put whatever you would like, but keep in mind that the system will play a message stating whatever you put in this field. (For example if you put “Kevin” in this field, the system will play a message saying “For Kevin press 1”)
o 13. Make sure the option for “Phone number” is selected under the option for “Select where to transfer the call”.
o 14. In the Phone number field enter in an imaginary number such as “+11234567980” or “+19999999999” and select “OK”. (Note: it is recommended you follow this format exactly).
Example:
o 15. From the main answering rules page select the “OK” option.
Example:
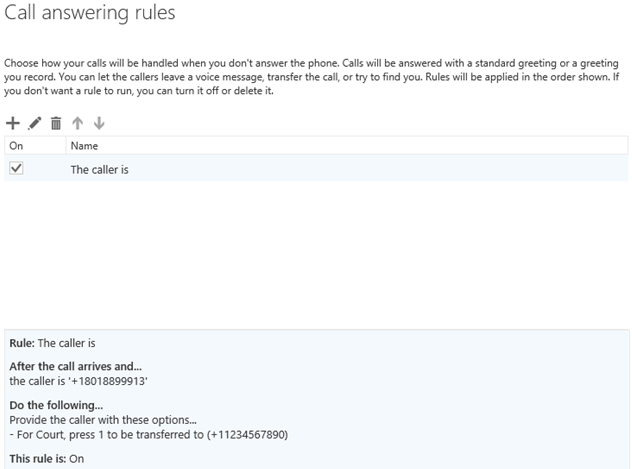
o 16. If the rule has successfully saved you should see an page appear similar to the image below.
Example:
o Once these steps have been completed callers will not be able to dial through to the user or leave a voicemail. The only indication that a call from a blocked caller has occurred will be from a “missed call” notification. Users can set up a rule in Outlook to move these messages to the “Deleted Items” folder if they wish. (Note: you will want to specify messages including the blocked phone number so that not all notifications are affected)