Cisco Connect Admin - Change User's DID
Goal
This article will go through the steps necessary to change the DID of a Cisco user in Connect.
Case Disposition:
Case Record Type: MACD
Type: AMC (Add, Move, Change)
Product: Cisco
SubProduct: Voice
Issue: Provisioning
Sub Issue: Move/Change User/Service/Hardware
Other Issue: Change DID
Priority: Standard
Department: Support
Resolution/Steps:
Step #1
Log in to the connect admin portal.
Navigate to the correct OU
On the "Users Tab" search for the user who's DID you wish to alter
Step #2
Once you have the correct user selected, click on the hamburger menu "≡" and highlight User Settings then click on Properties.
Then browse to and select option 3 "Phone".
Here you will see the current users number in the "IP Phone" option.
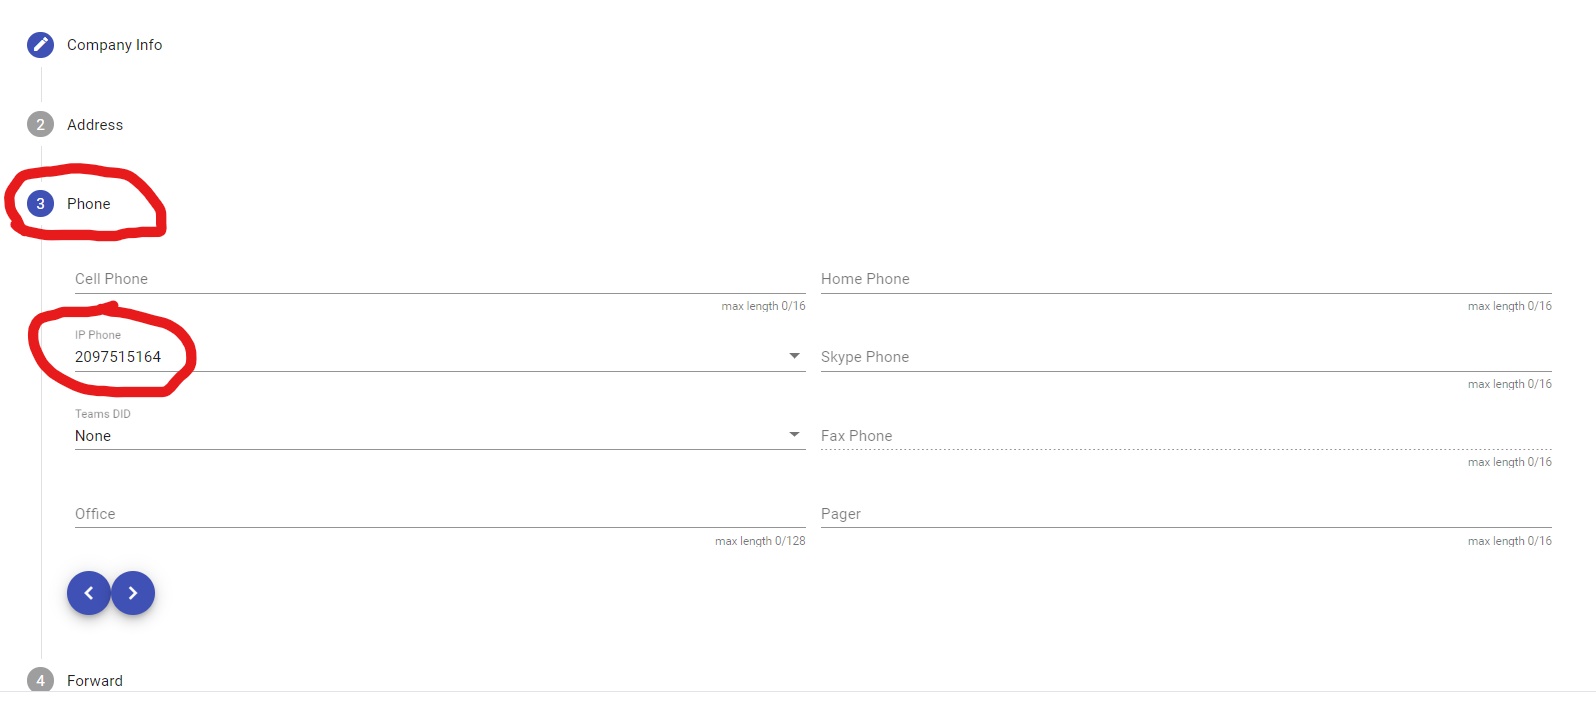
If you click on the number it will show you available options to change it to. Select the desired DID then hit save. Once the event has finished processing, refresh the page and you will see the new DID attached to the user.
NOTE: It will only show Available DID's in the same location as the user with a PH type.
NOTE: The user's EXT will also change as the EXT's are tied to the DID, not the user.