| 1 |
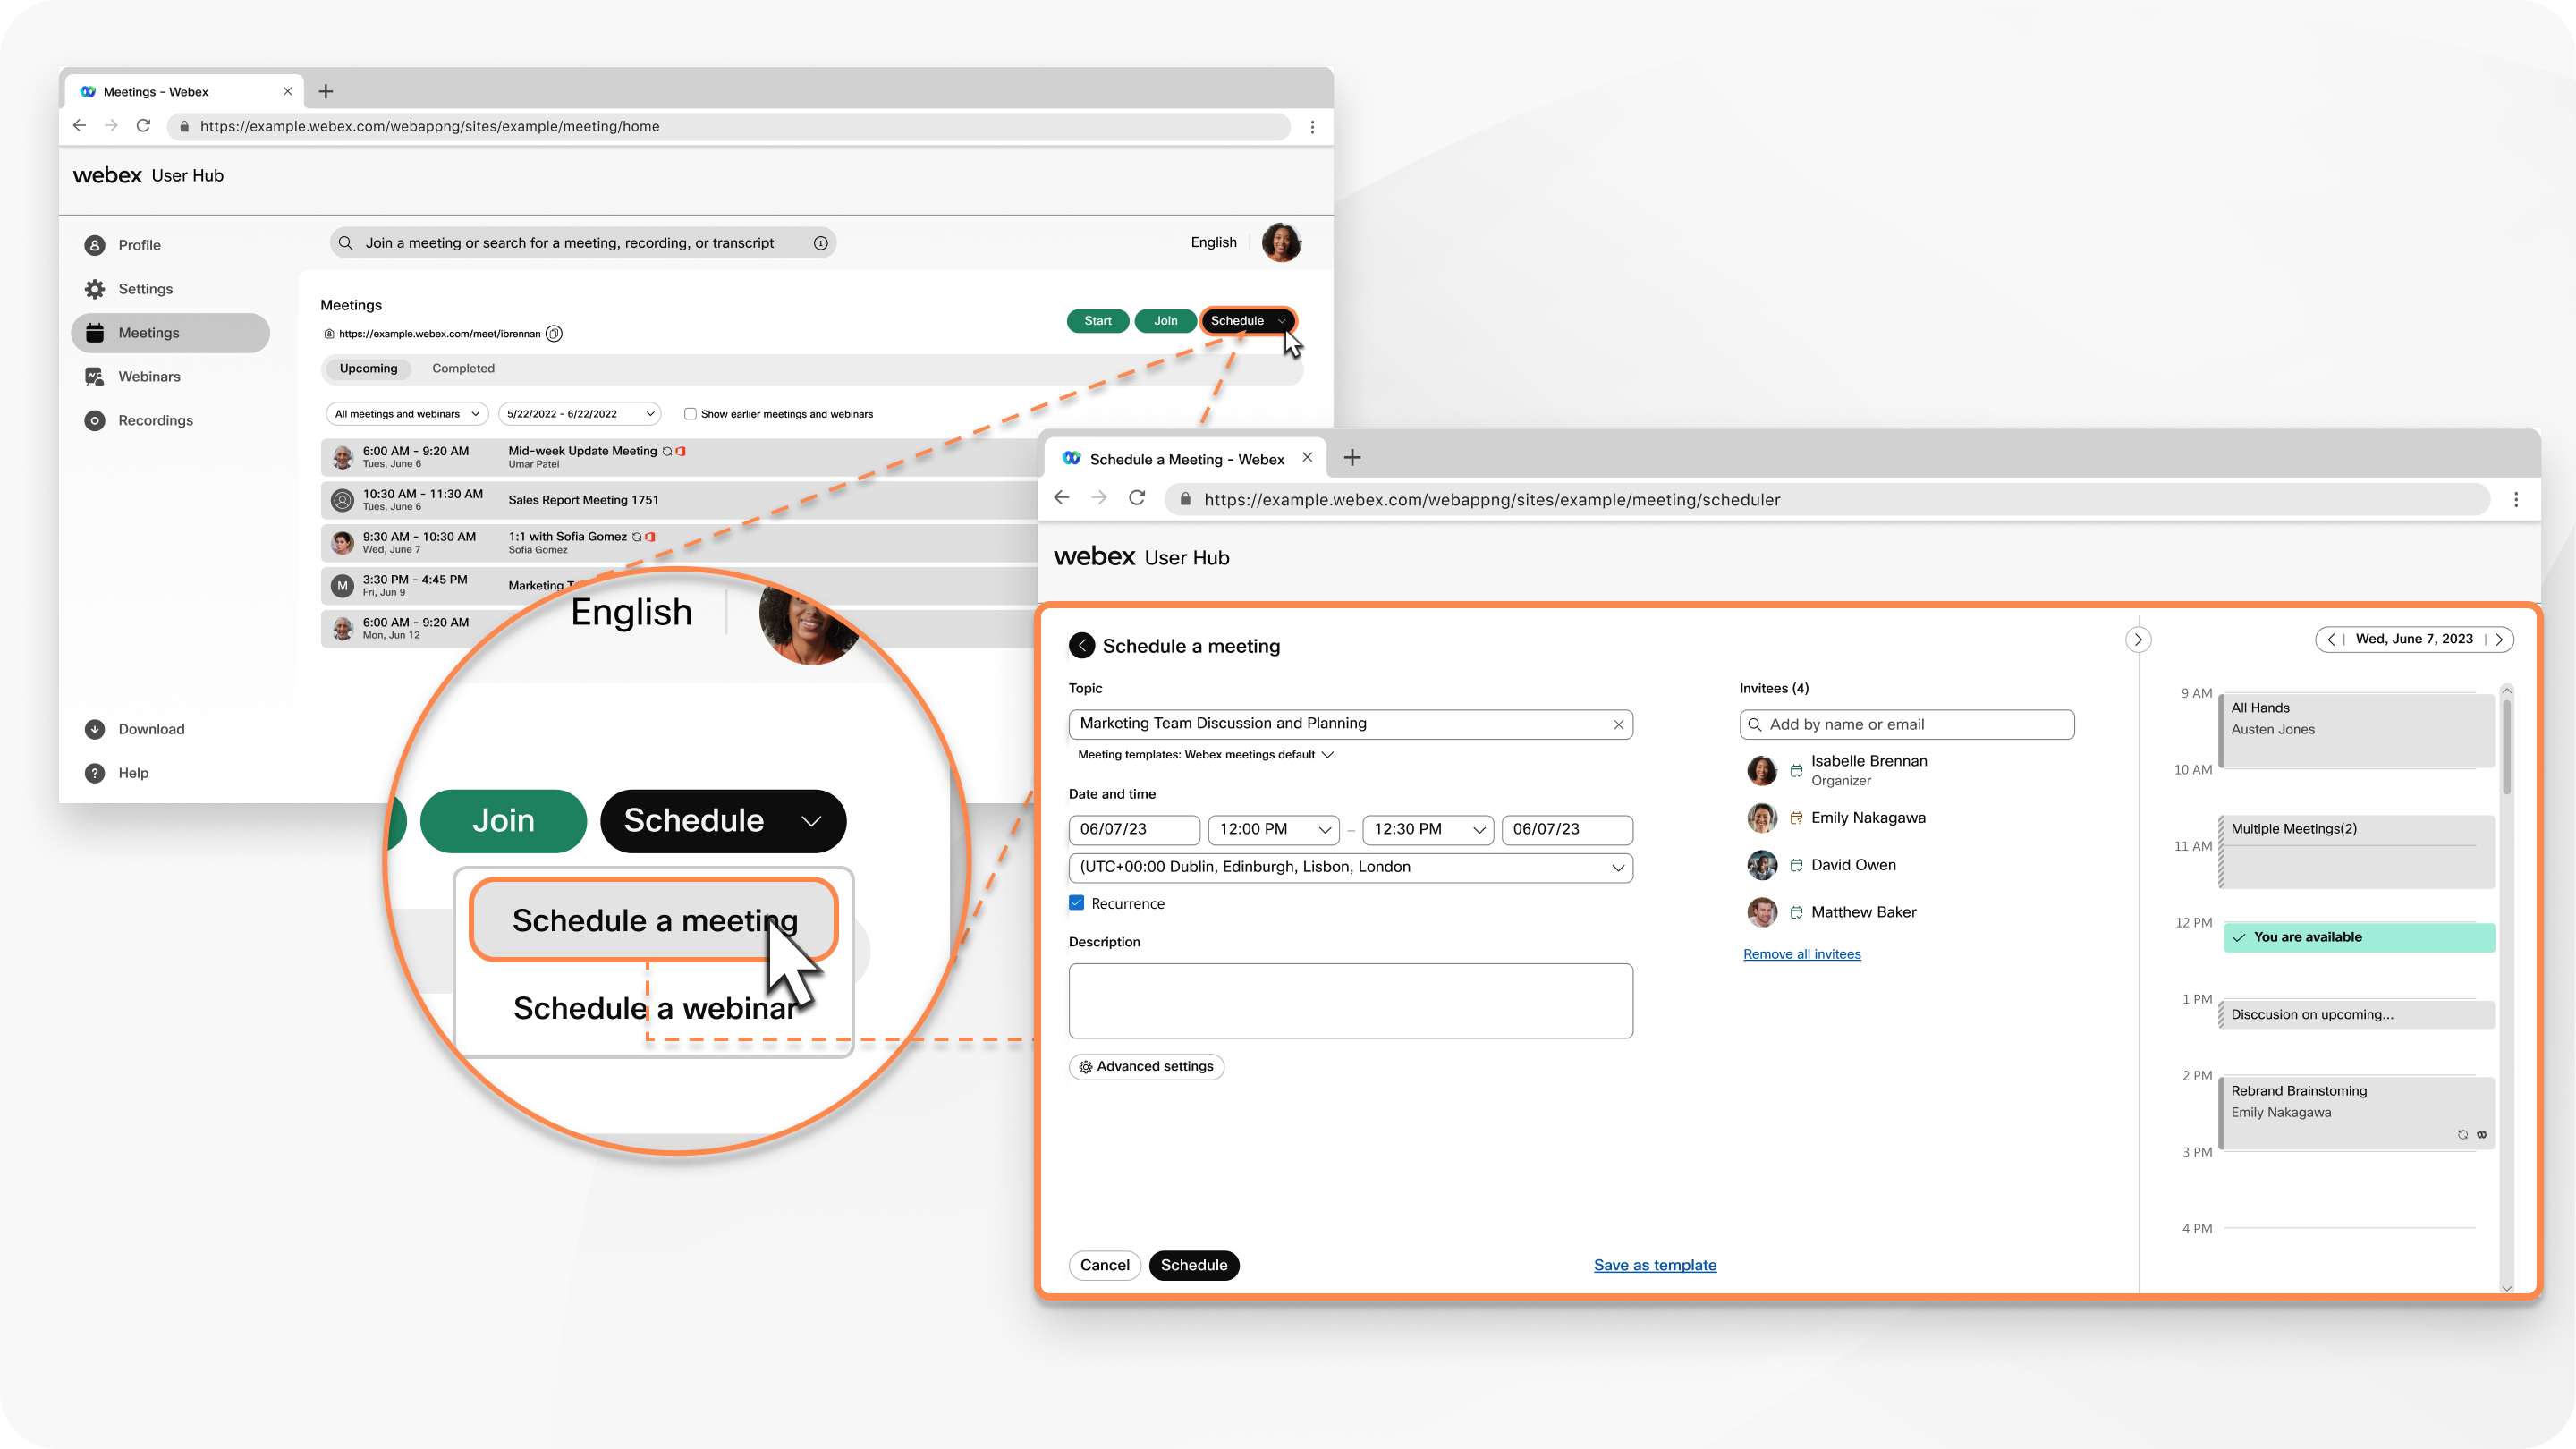
Sign in to your Webex site, then select Schedule a Meeting.
|
| 2 |
(Optional) If you have any saved meeting templates, you can select one from the Meeting templates.
|
| 3 |
Add the basics by providing the following information:
- Meeting type—Meeting types are default or customized meeting features available for your site. Your account can have one or more meeting types associated with it.
- Meeting topic—Choose a topic that people will recognize and get excited about.
- Date and time—Indicate when the meeting will take place. If you're inviting people from different time zones, click the Time zone planner so you can find a time that works best for everyone.
You can also set the meeting to repeat daily, weekly, monthly, and so on by checking the Recurrence check box.
- Invitees—Enter the email addresses of the people you want to invite to your meeting. If they have an account on this site, you can select
 next to their name if you want them to be a cohost. next to their name if you want them to be a cohost.
- Meeting agenda—Add any context or details you want your attendees to have about the upcoming meeting.
|
| 4 |
If your site administrator has enabled Tracking Codes, click Edit tracking code to enter the required information.
|
| 5 |
In the Security section, add the following information:
- Meeting password—Use the password that's provided or enter your own. Attendees must enter this password to join your meeting.
- Exclude password—Check this check box if you don't want the meeting password in the email invitation.
- Automatic lock—Check this check box to lock your meeting after it starts.
- Unlocked meetings—Select an option for people who are not included in the meeting invitation:
-
Guests can join the meeting
-
Guests wait in the lobby until the host admits them
-
Guests can't join the meeting
- Join before host—Allow panelists and attendees to join your meeting and panelists to connect their audio before the meeting starts.
|
| 6 |
In the Audio connection options section, add the following information:
- Audio connection type
- Webex Audio—Choose to support call-in, call-back, and computer audio options. You can also include toll-free and global call-in numbers and set entry and exit tones to hear when someone joins or leaves the webinar.

|
When using Webex Audio with the Announce Name feature, panelists who select the Use computer for audio option can't record and announce their names
|
- Use VoIP only—Limits all panelists to using computer audio.
- Other teleconference services—Allows you to enter third-party teleconference information.
- None—No audio.
- Mute panelist
- Allow the host and cohosts to unmute participants (Moderated unmute mode)—Hosts and cohosts can unmute participants and SIP-based video devices directly without sending an unmute request.
- Allow attendees to unmute themselves in the meeting—If you mute attendees when they join, select this option to allow them to unmute themselves during the meeting.
|
Don't select this option if you want only the host or cohost to be able to unmute attendees.
|
- Always mute attendees when they join the meeting—Automatically mute attendees when they join the meeting. To allow attendees to raise their hands, see Raise your hand in Webex Meetings, Webex Webinars, and Webex Events (classic).
|
| 7 |
Click Advanced options for additional options for cohosts, breakout sessions, registration, and more.
|
| 8 |
To save these settings for future use, click Save as template.
|
| 9 |
To start your meeting immediately, click Start; if you're meeting later, click Schedule.
For scheduled meetings, you can add the meeting to your calendar by opening the meeting from Meetings > Add to my calendar . This option appears next to the name of the meeting: . This option appears next to the name of the meeting:
An iCalender (.ics) file downloads. Select the .ics file and accept the meeting. Send the .ics file as an email attachment to invite others to your meeting.
|